Guides


To enhance the security of your Microsoft account, enabling Two-Factor Authentication (2FA) is a must. This guide will walk you through the process of setting up 2FA using the Authenticator App.
Step By Step Guide
1
STEP 01
For iOS: Visit the App Store and search for "Authenticator App" Download and install the app.
For Android: Head to the Google Play Store, search for "Authenticator App" and install it.
2
STEP 02
Log in to your Microsoft account by entering your username and password. Once logged in, click on your account iconin the top-right corner of the screen and select My Microsoft account from the dropdown menu.

3
STEP 03
From the account settings, navigate to the Security section and click the Security dashboard button.

4
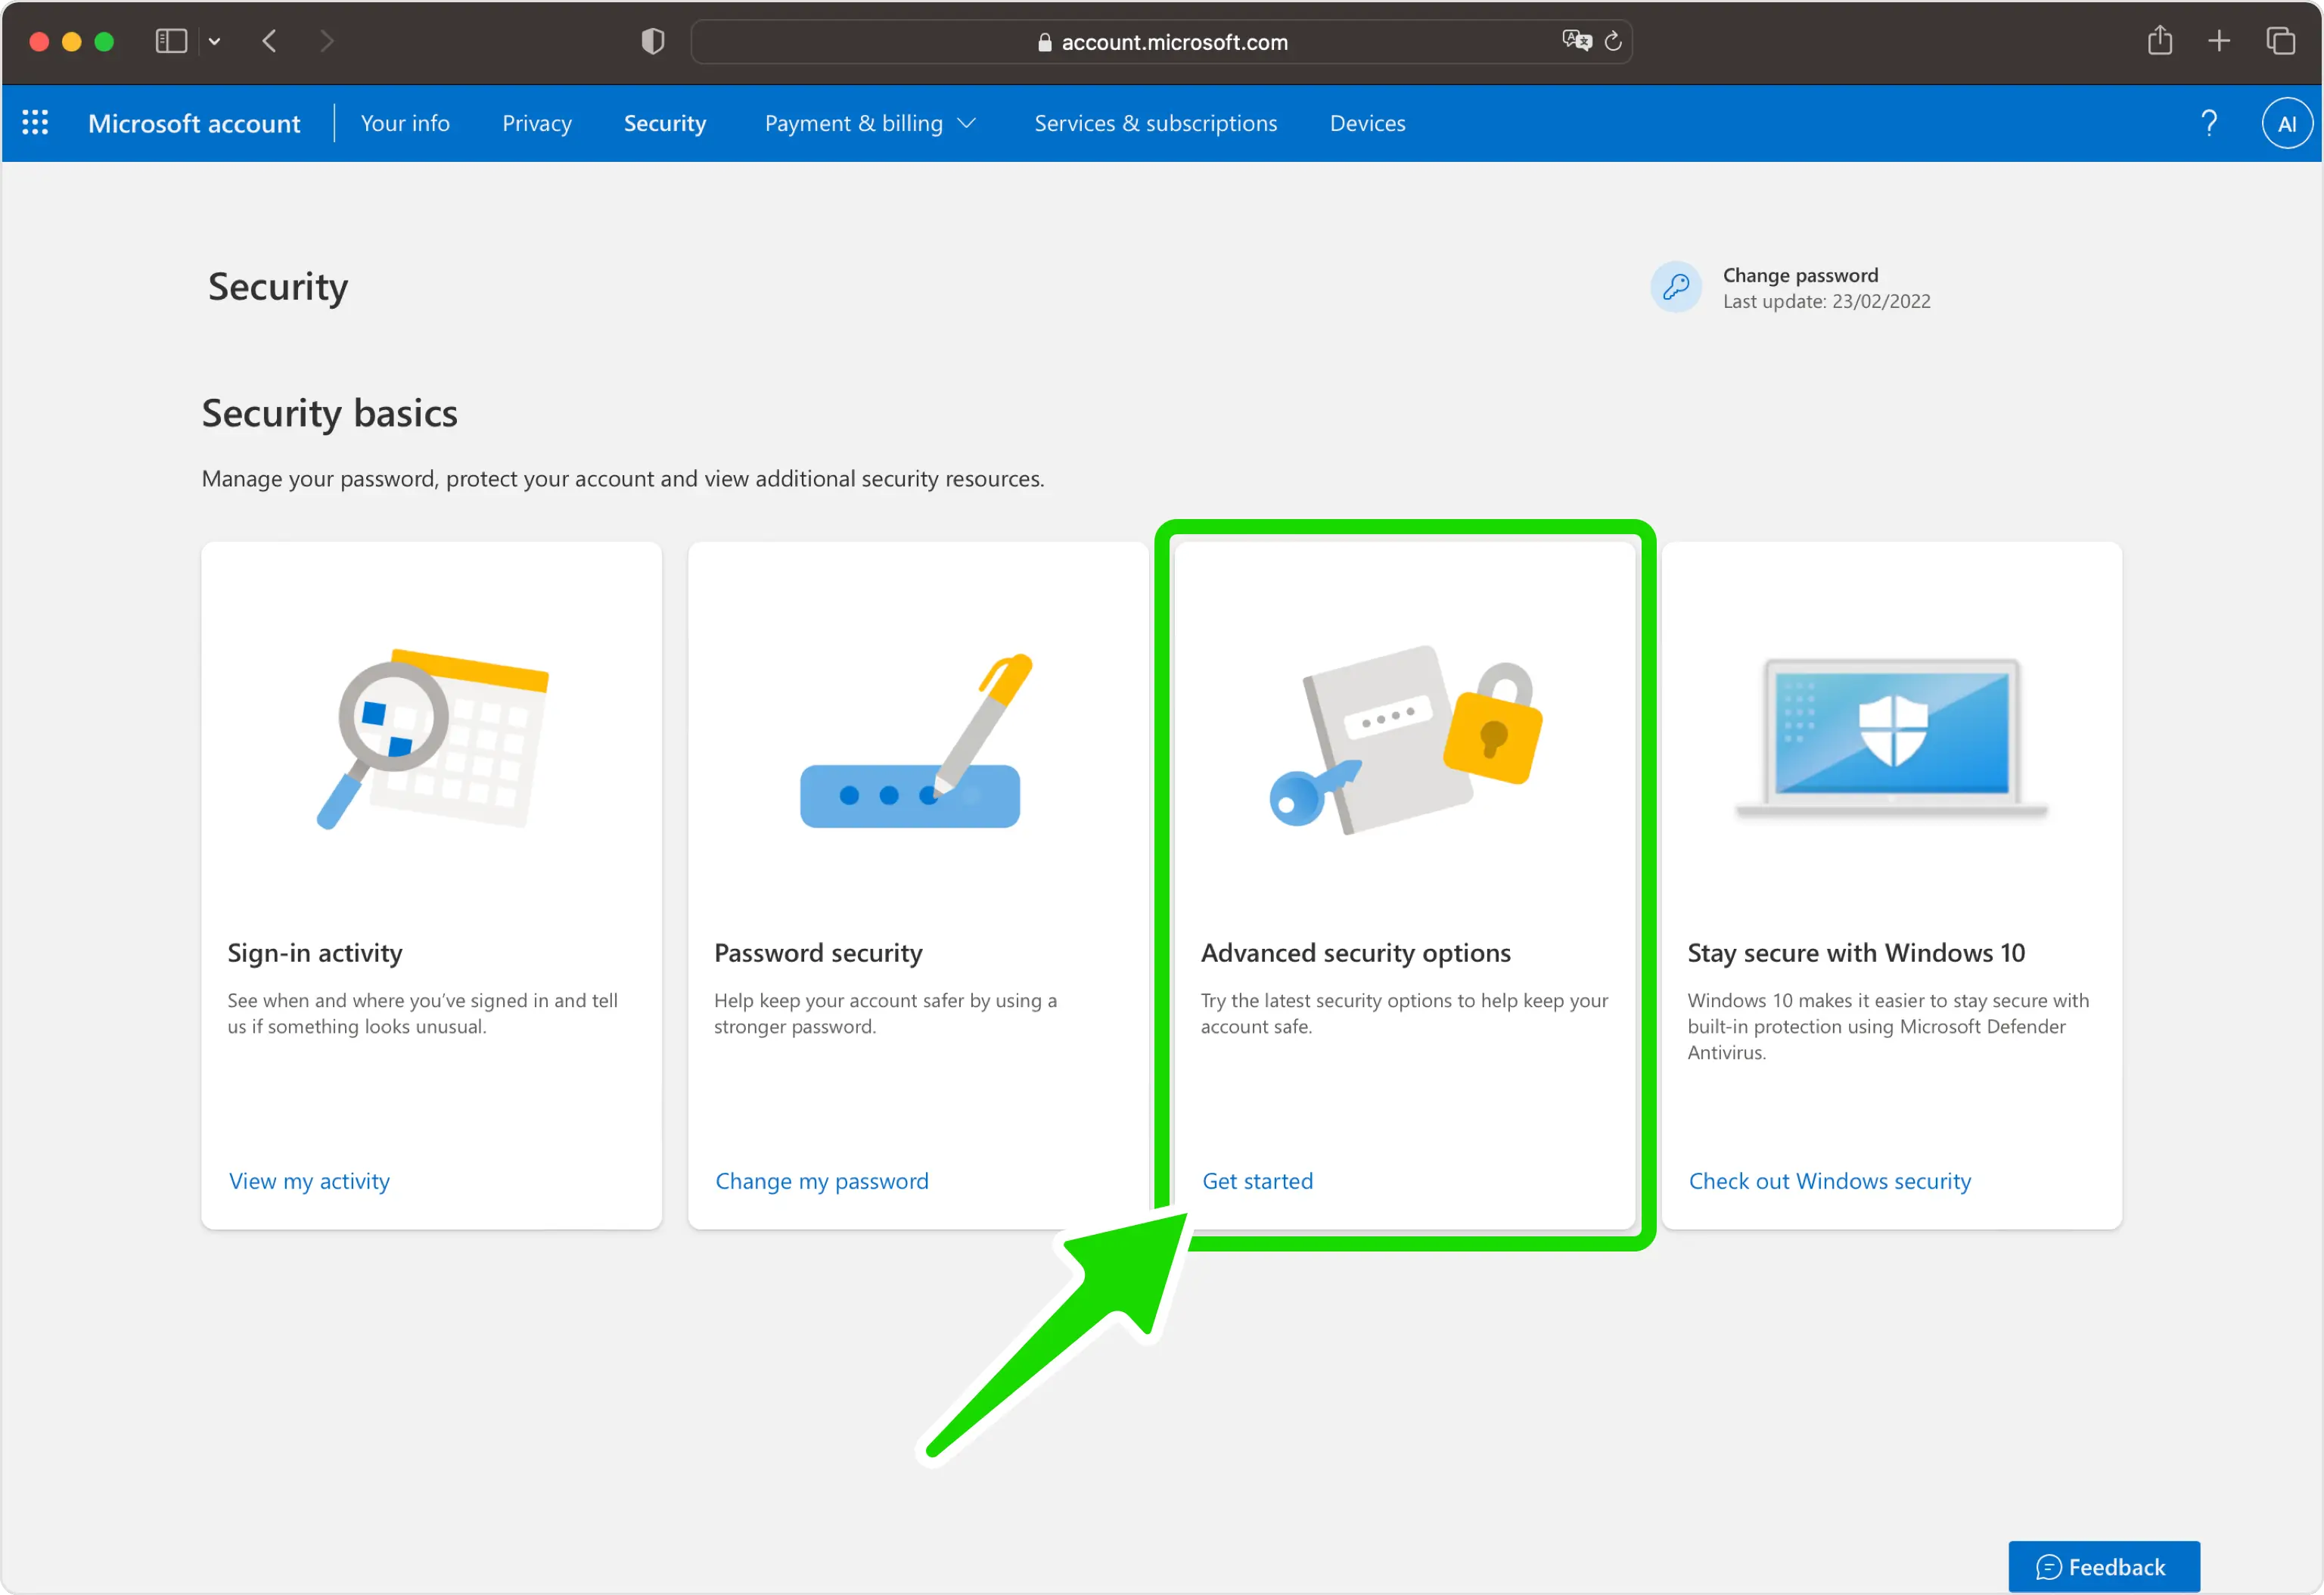
STEP 04
Under the Advanced Security Options section, click on the Get started button.
5
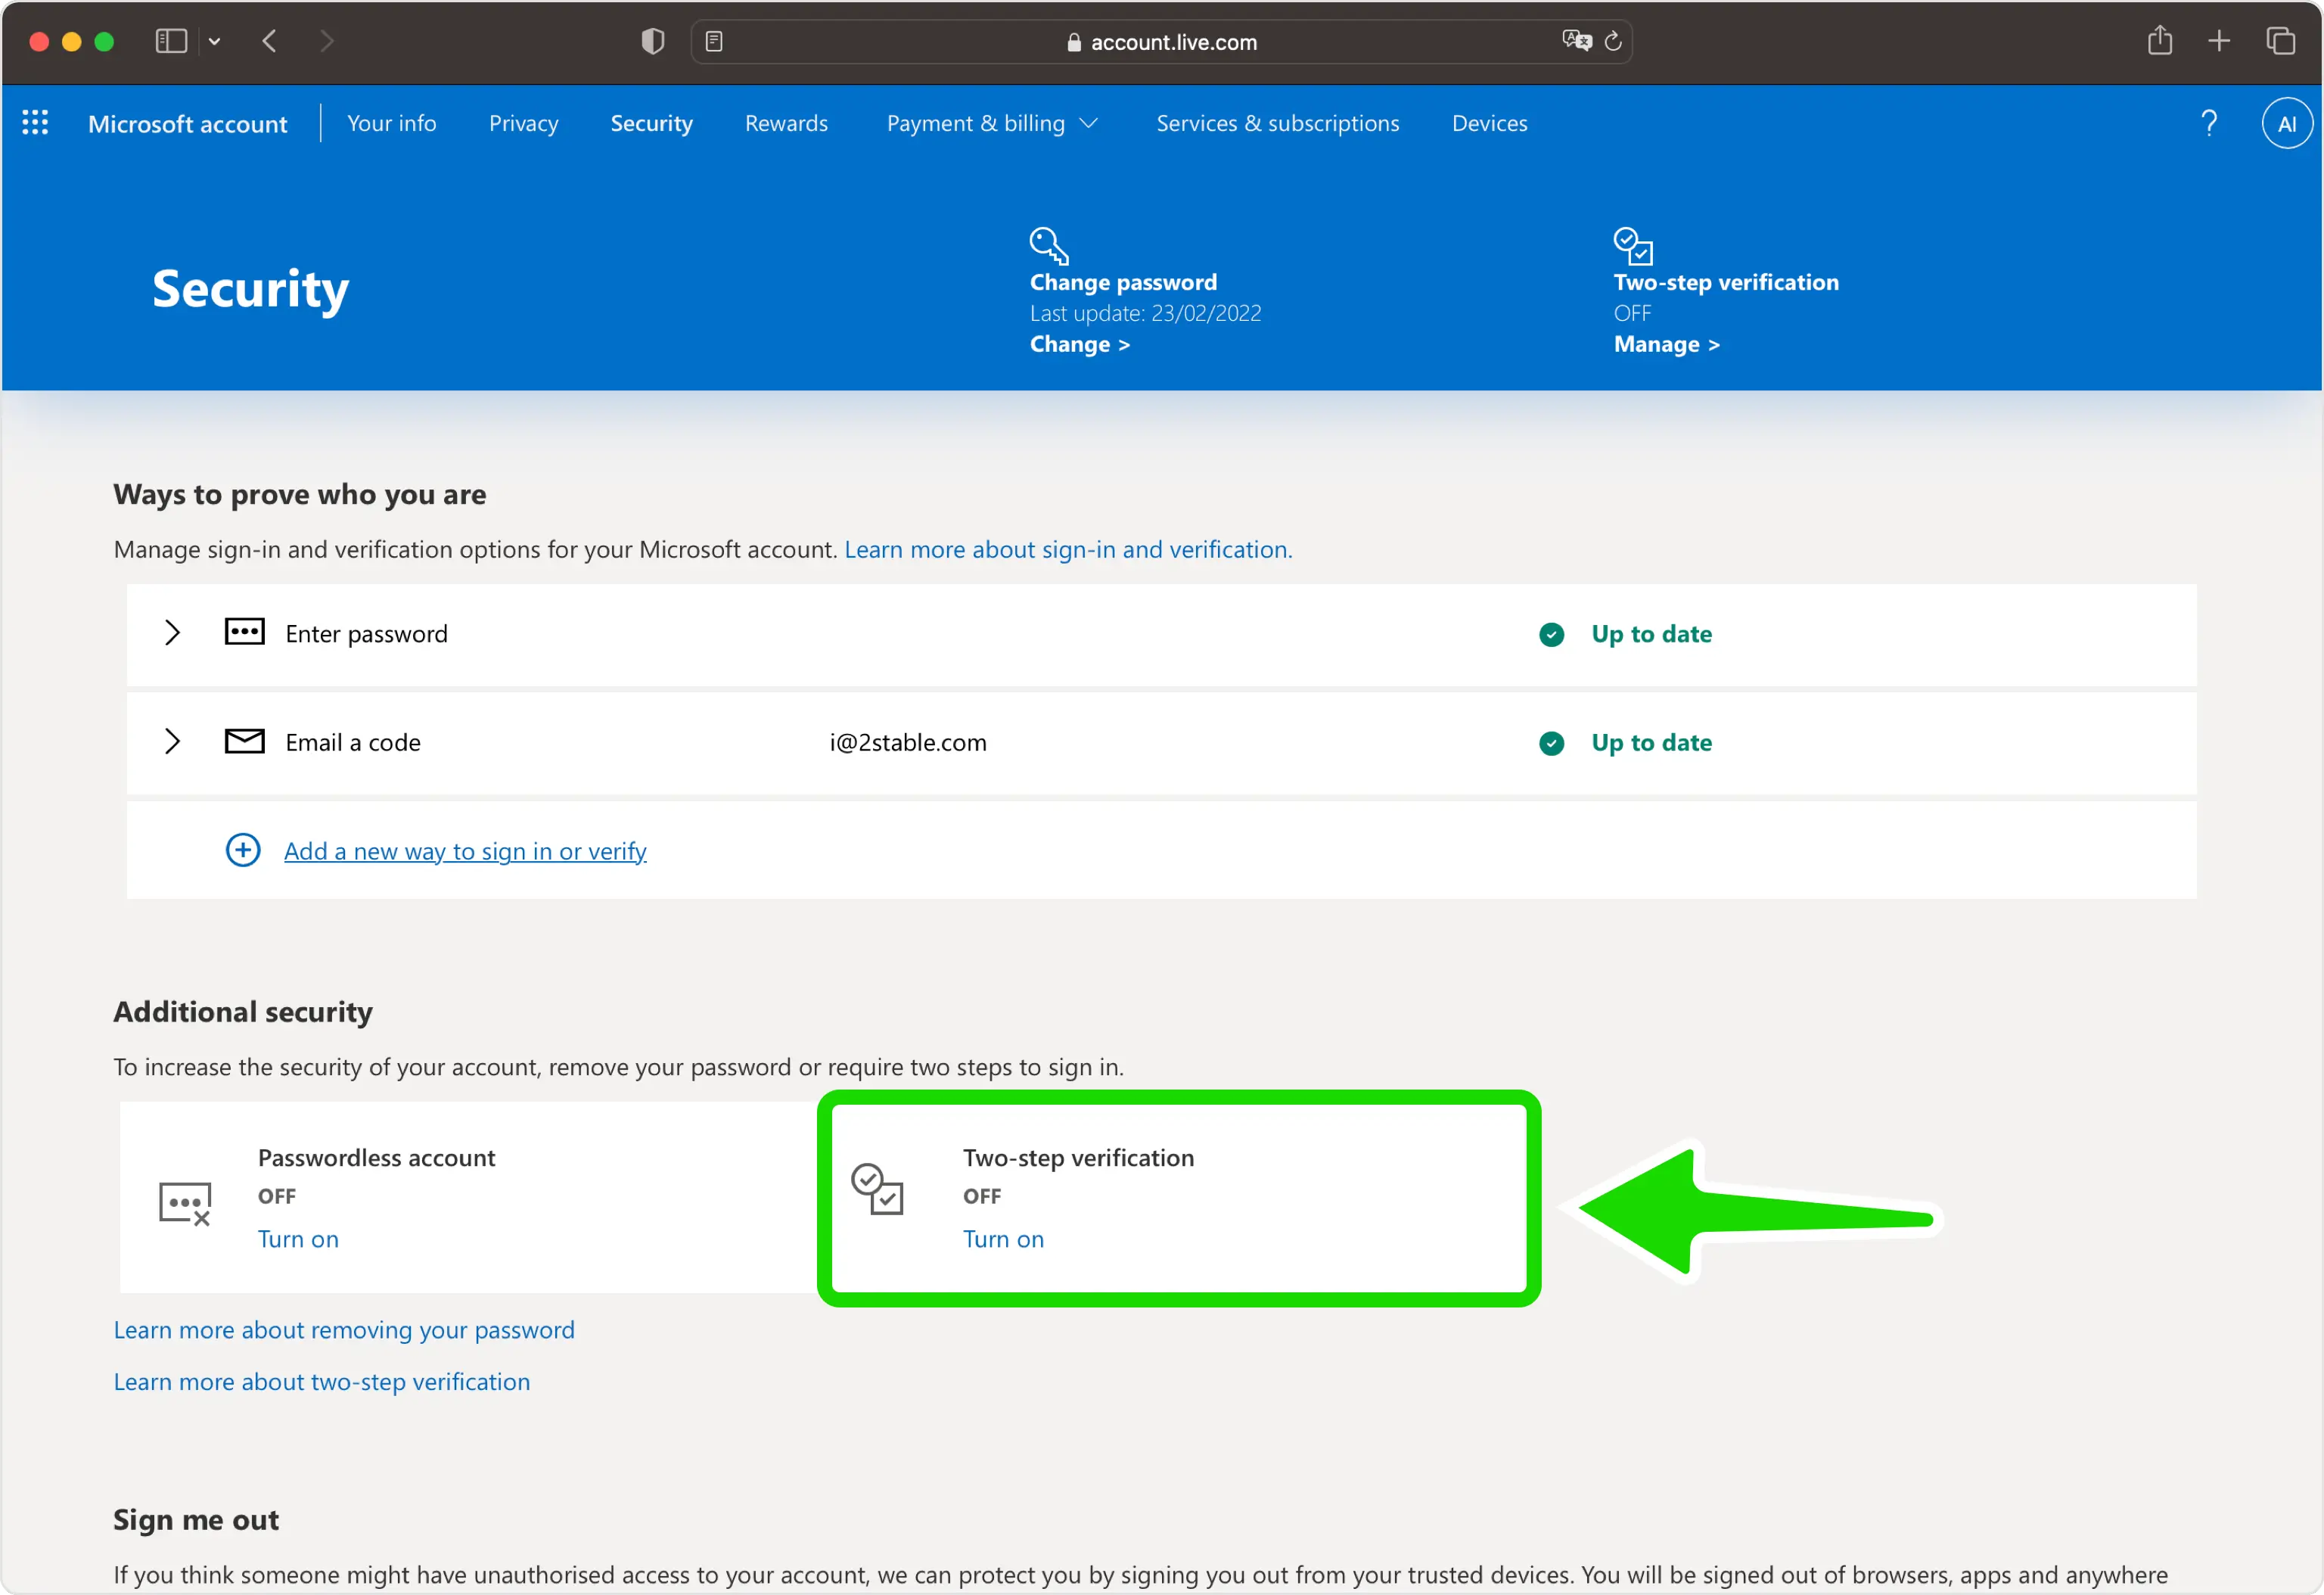
STEP 05
In the Additional security section, locate the Two-step verification option and click Turn on.
6
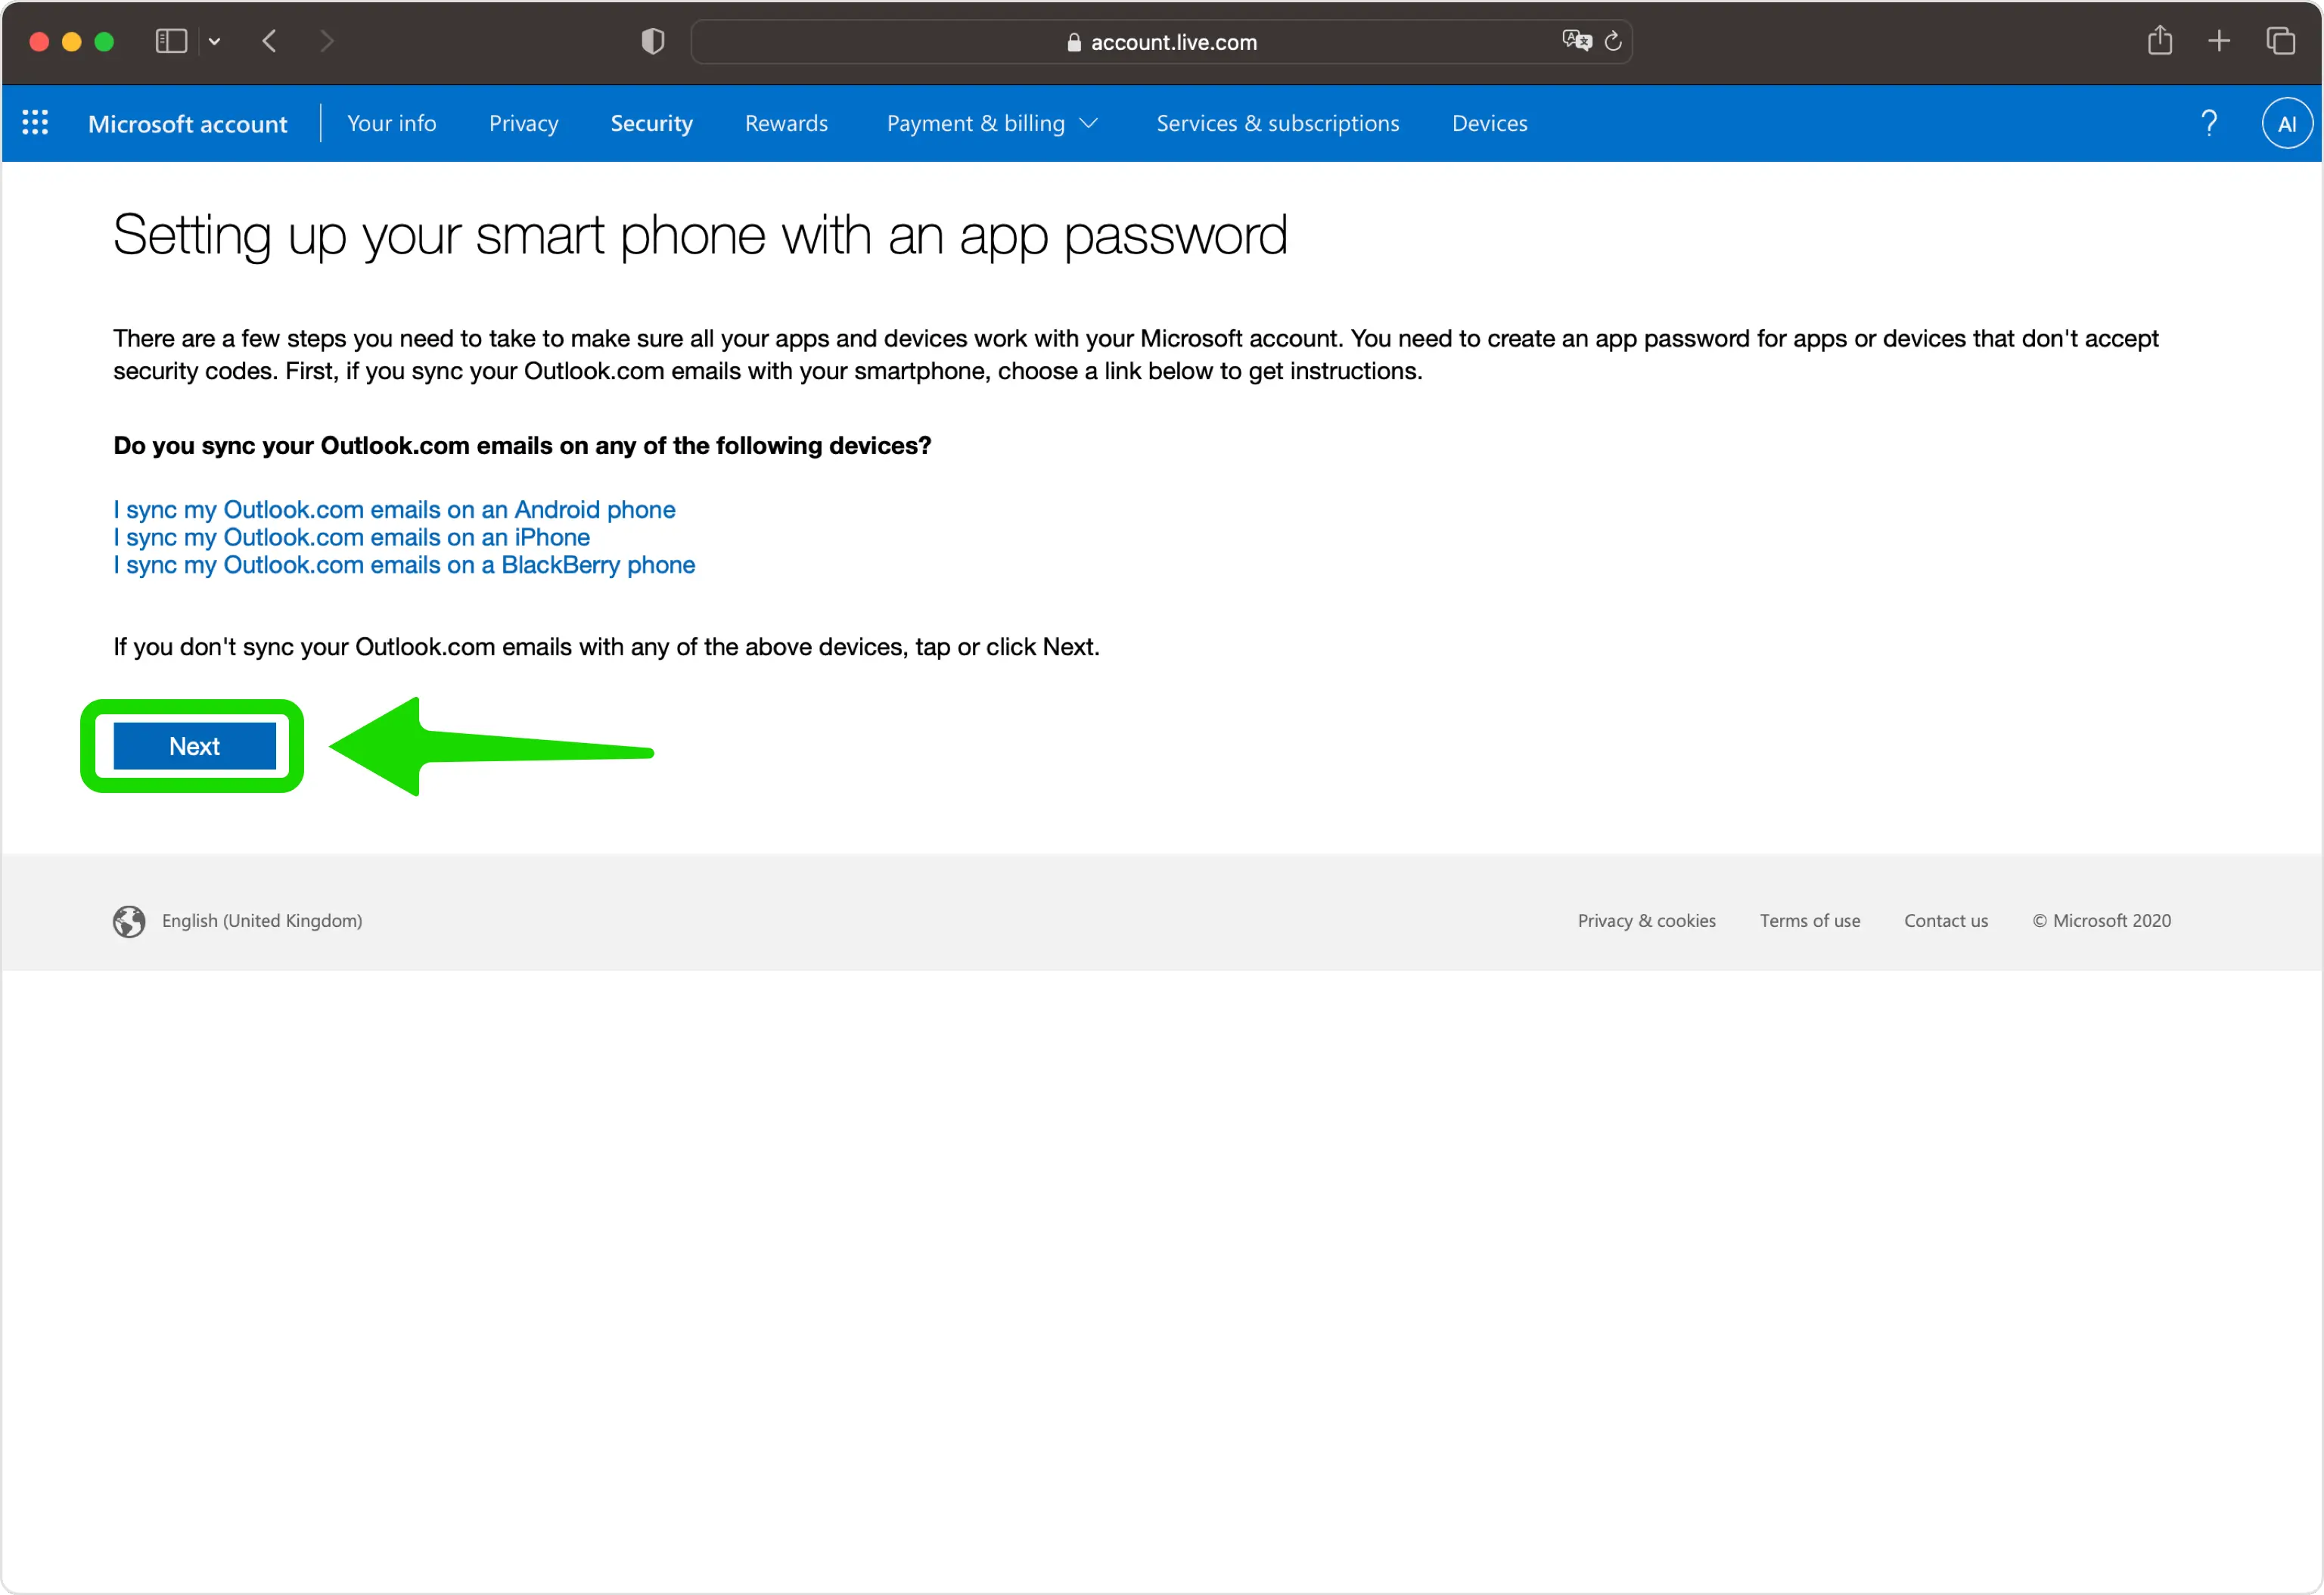
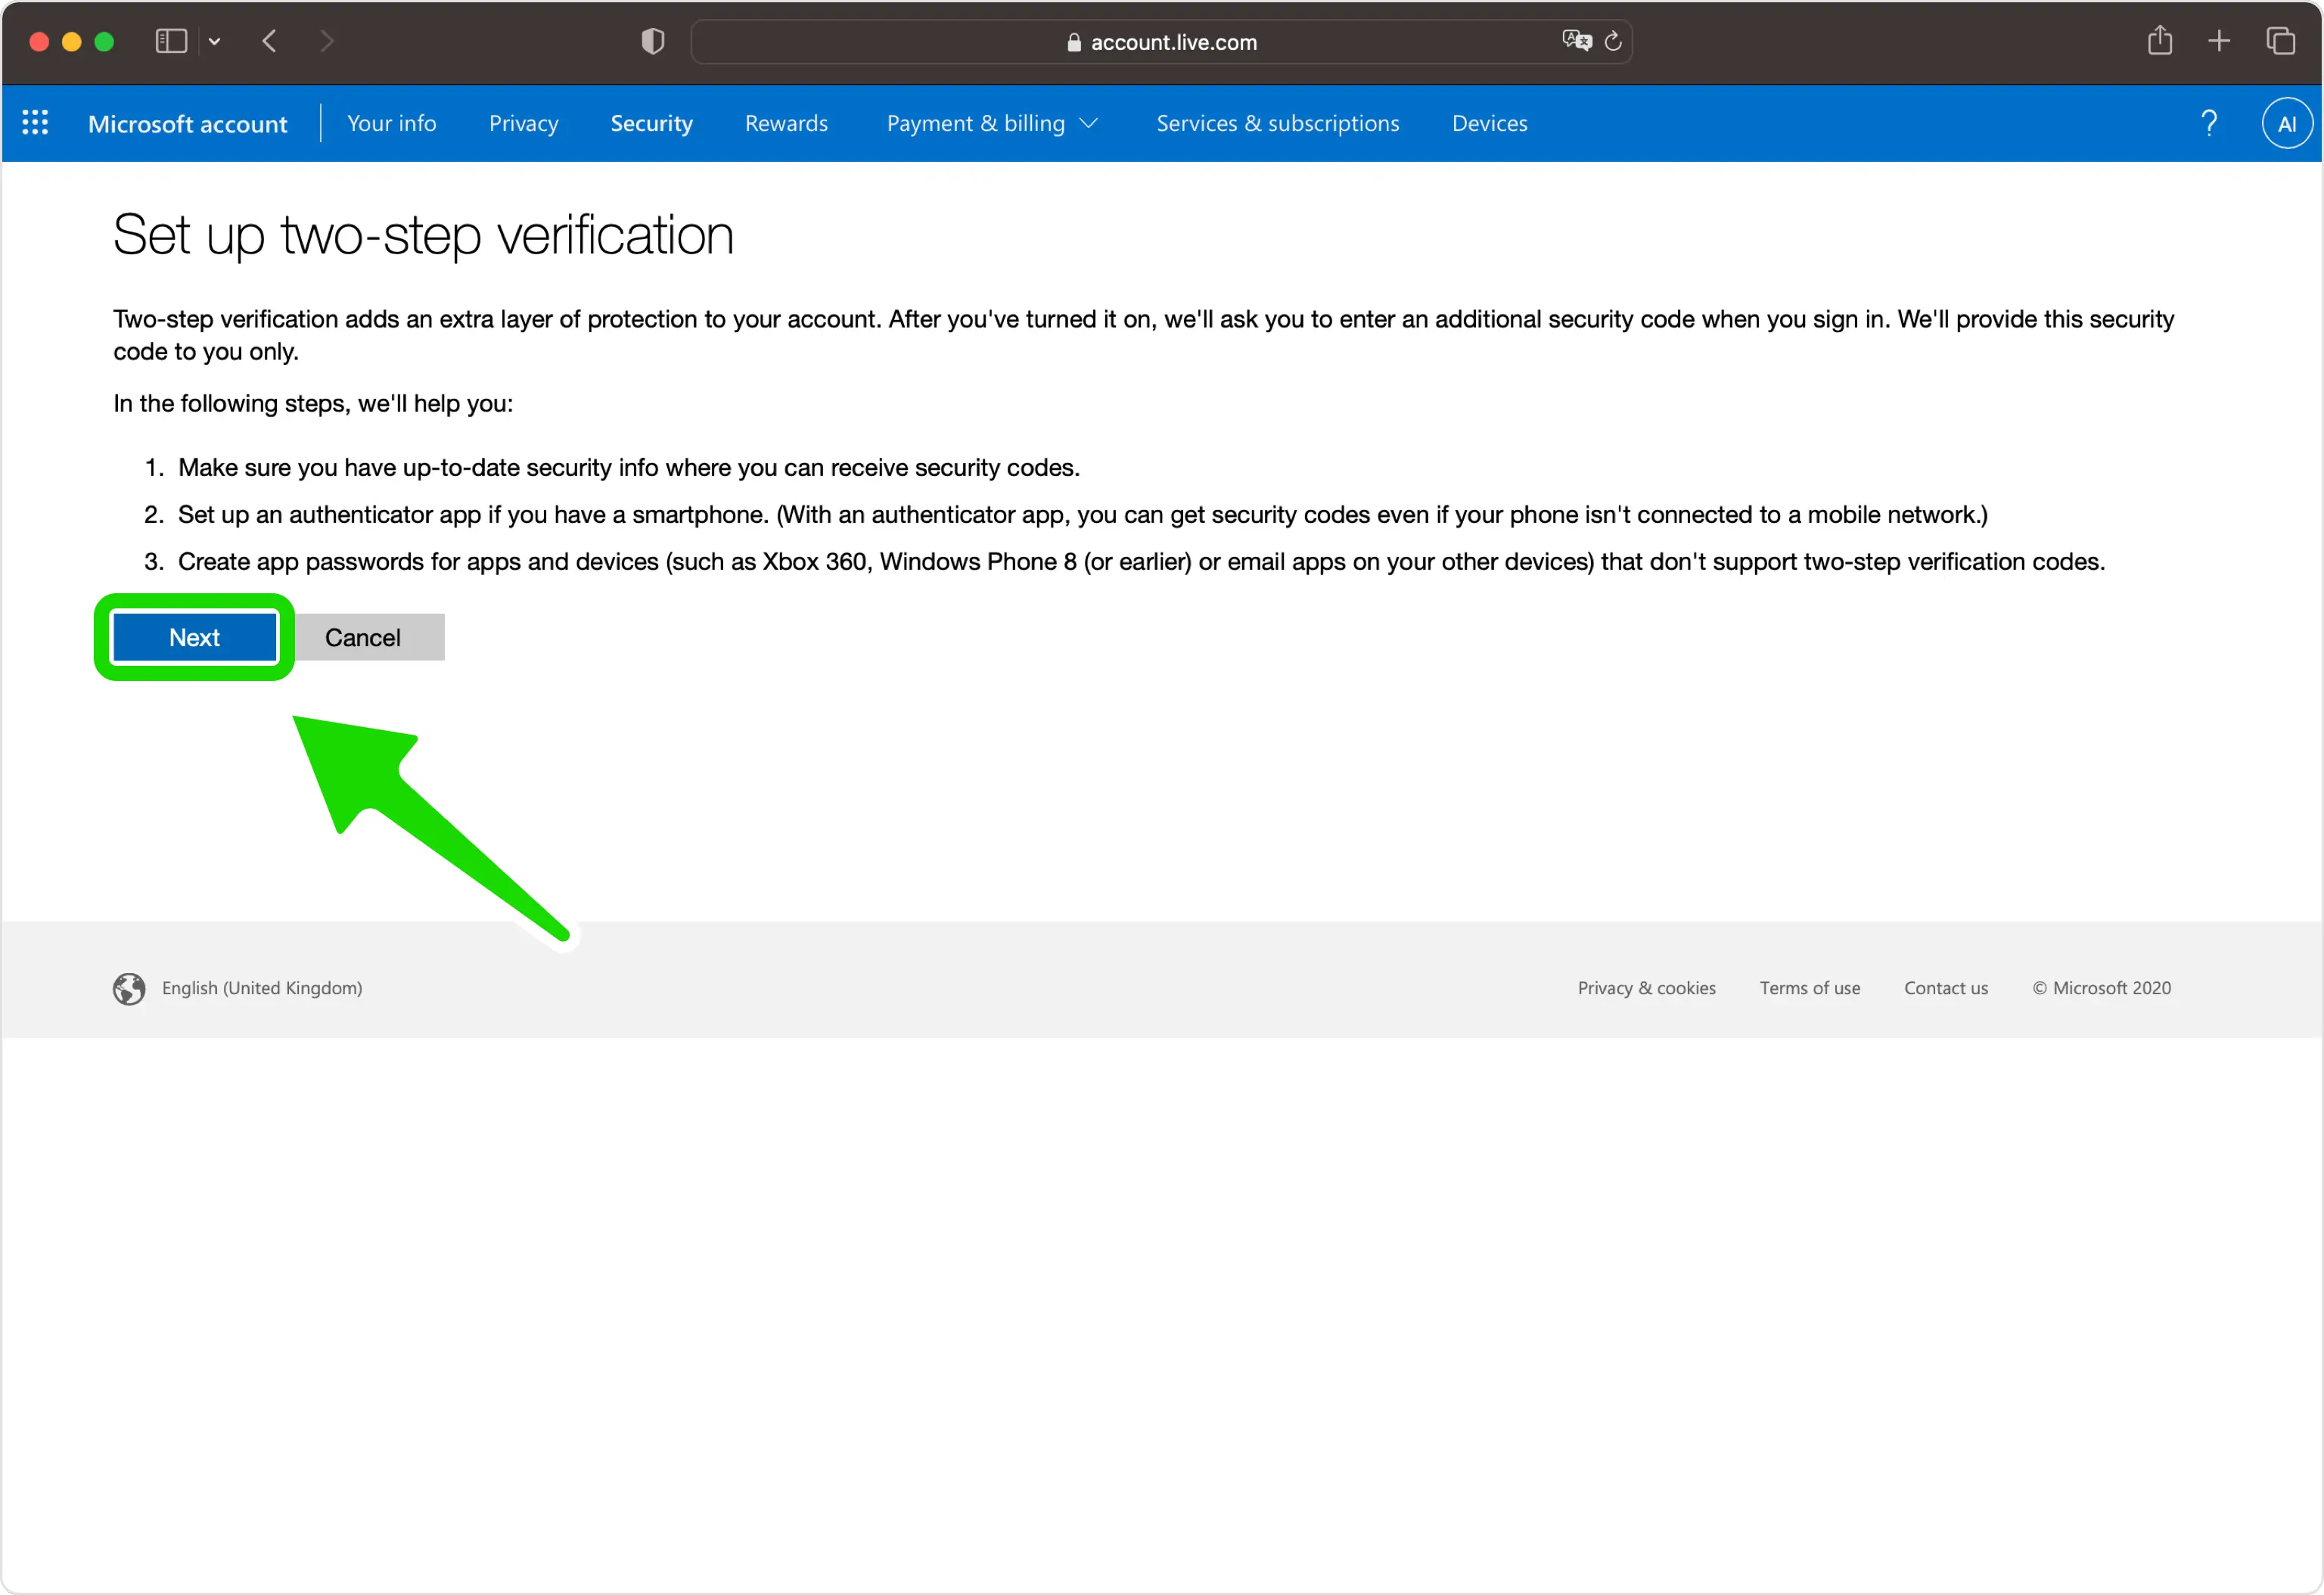
STEP 06
Click the Next button to proceed to the next step in the setup process
7
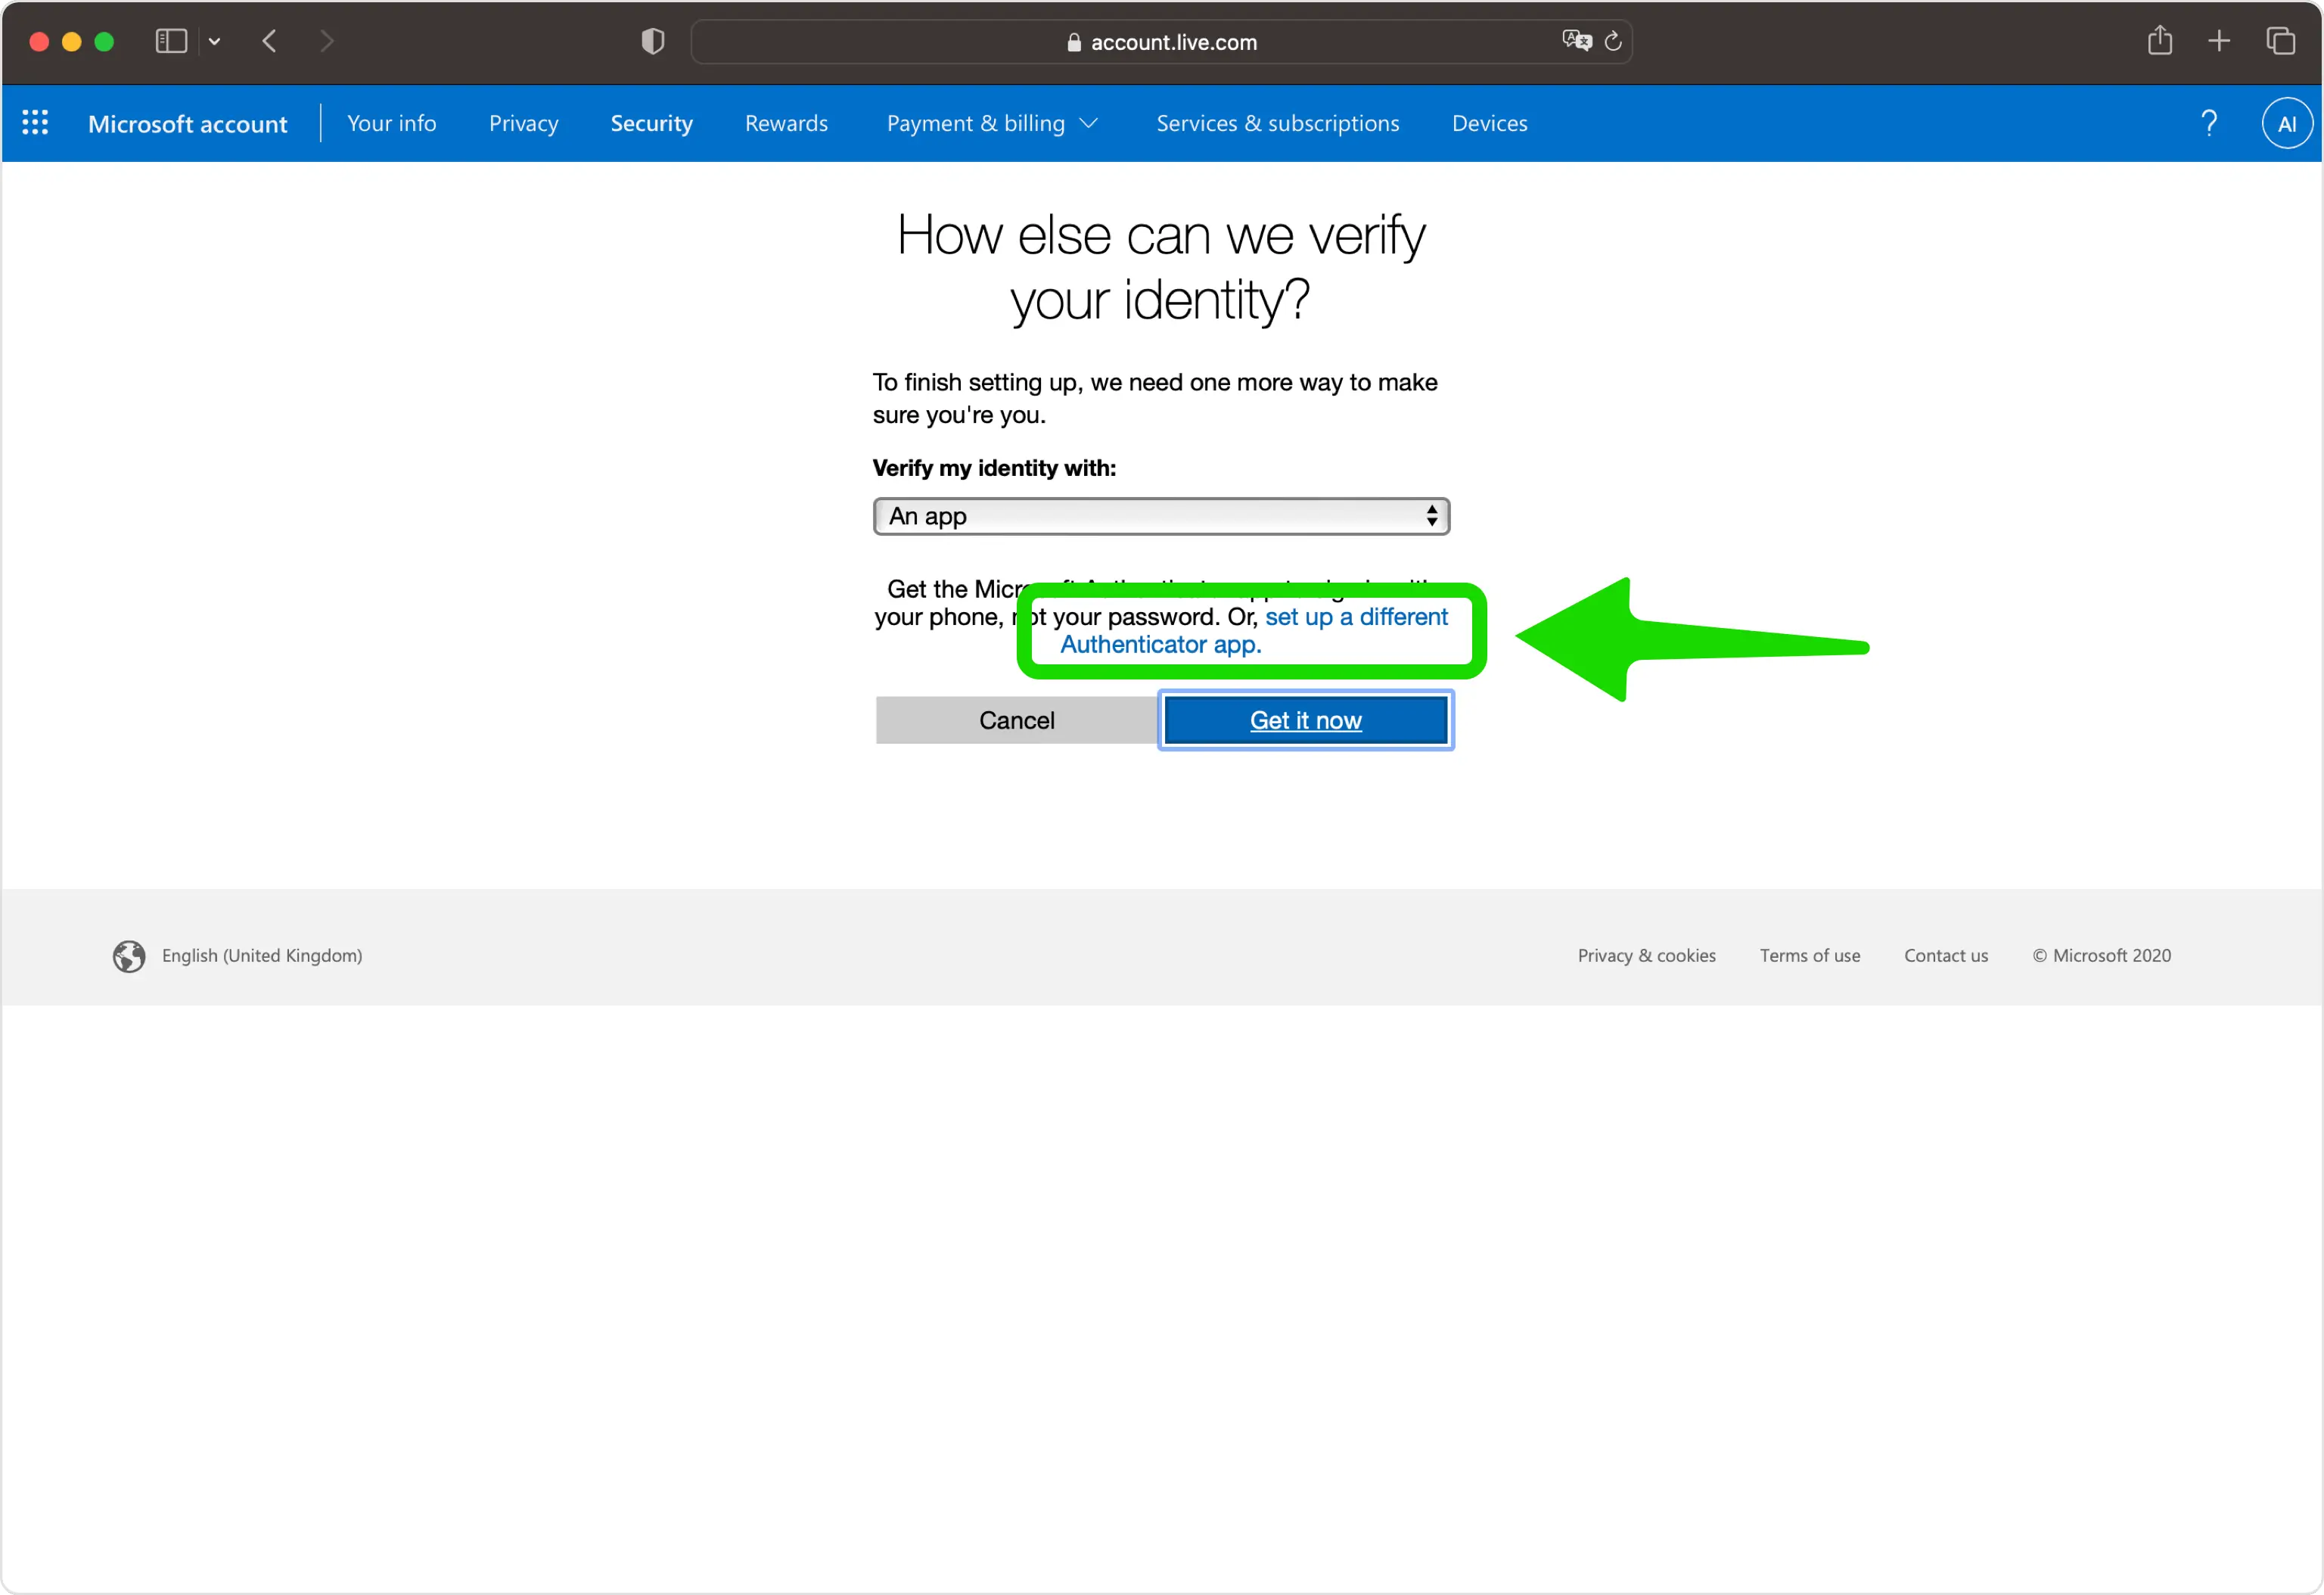
STEP 07
When prompted, select the option to set up a different Authenticator app.
8
STEP 08
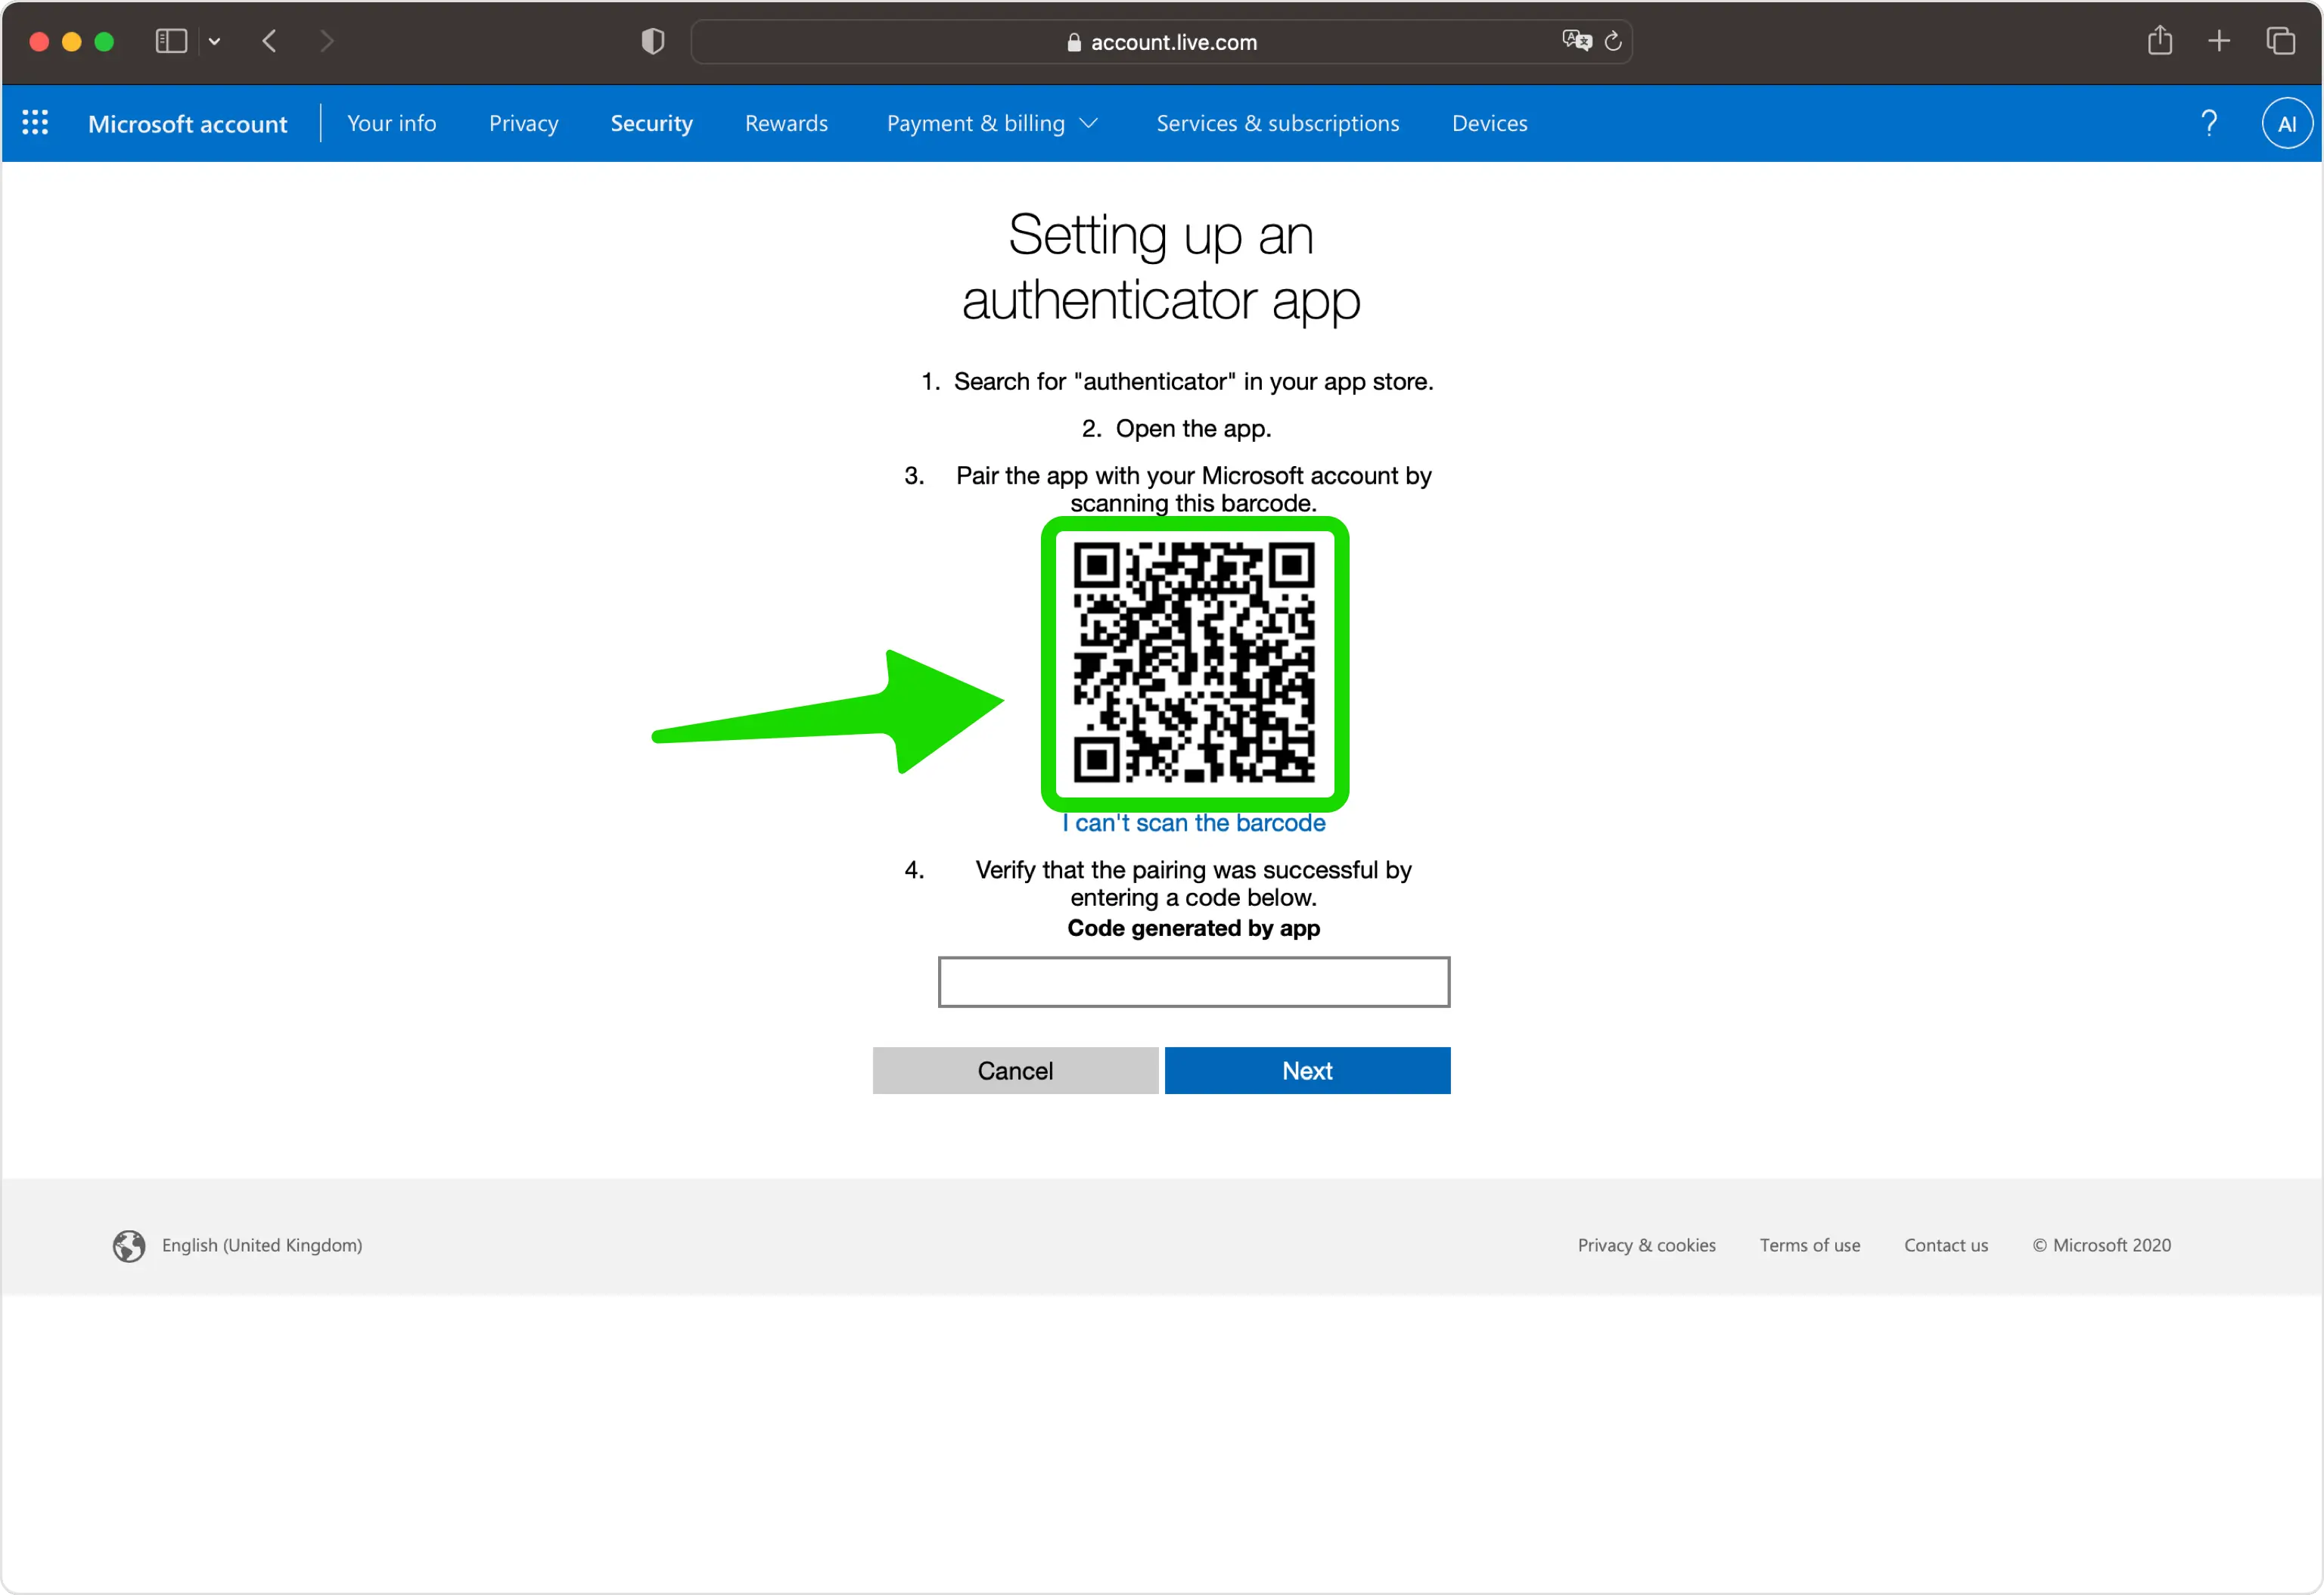
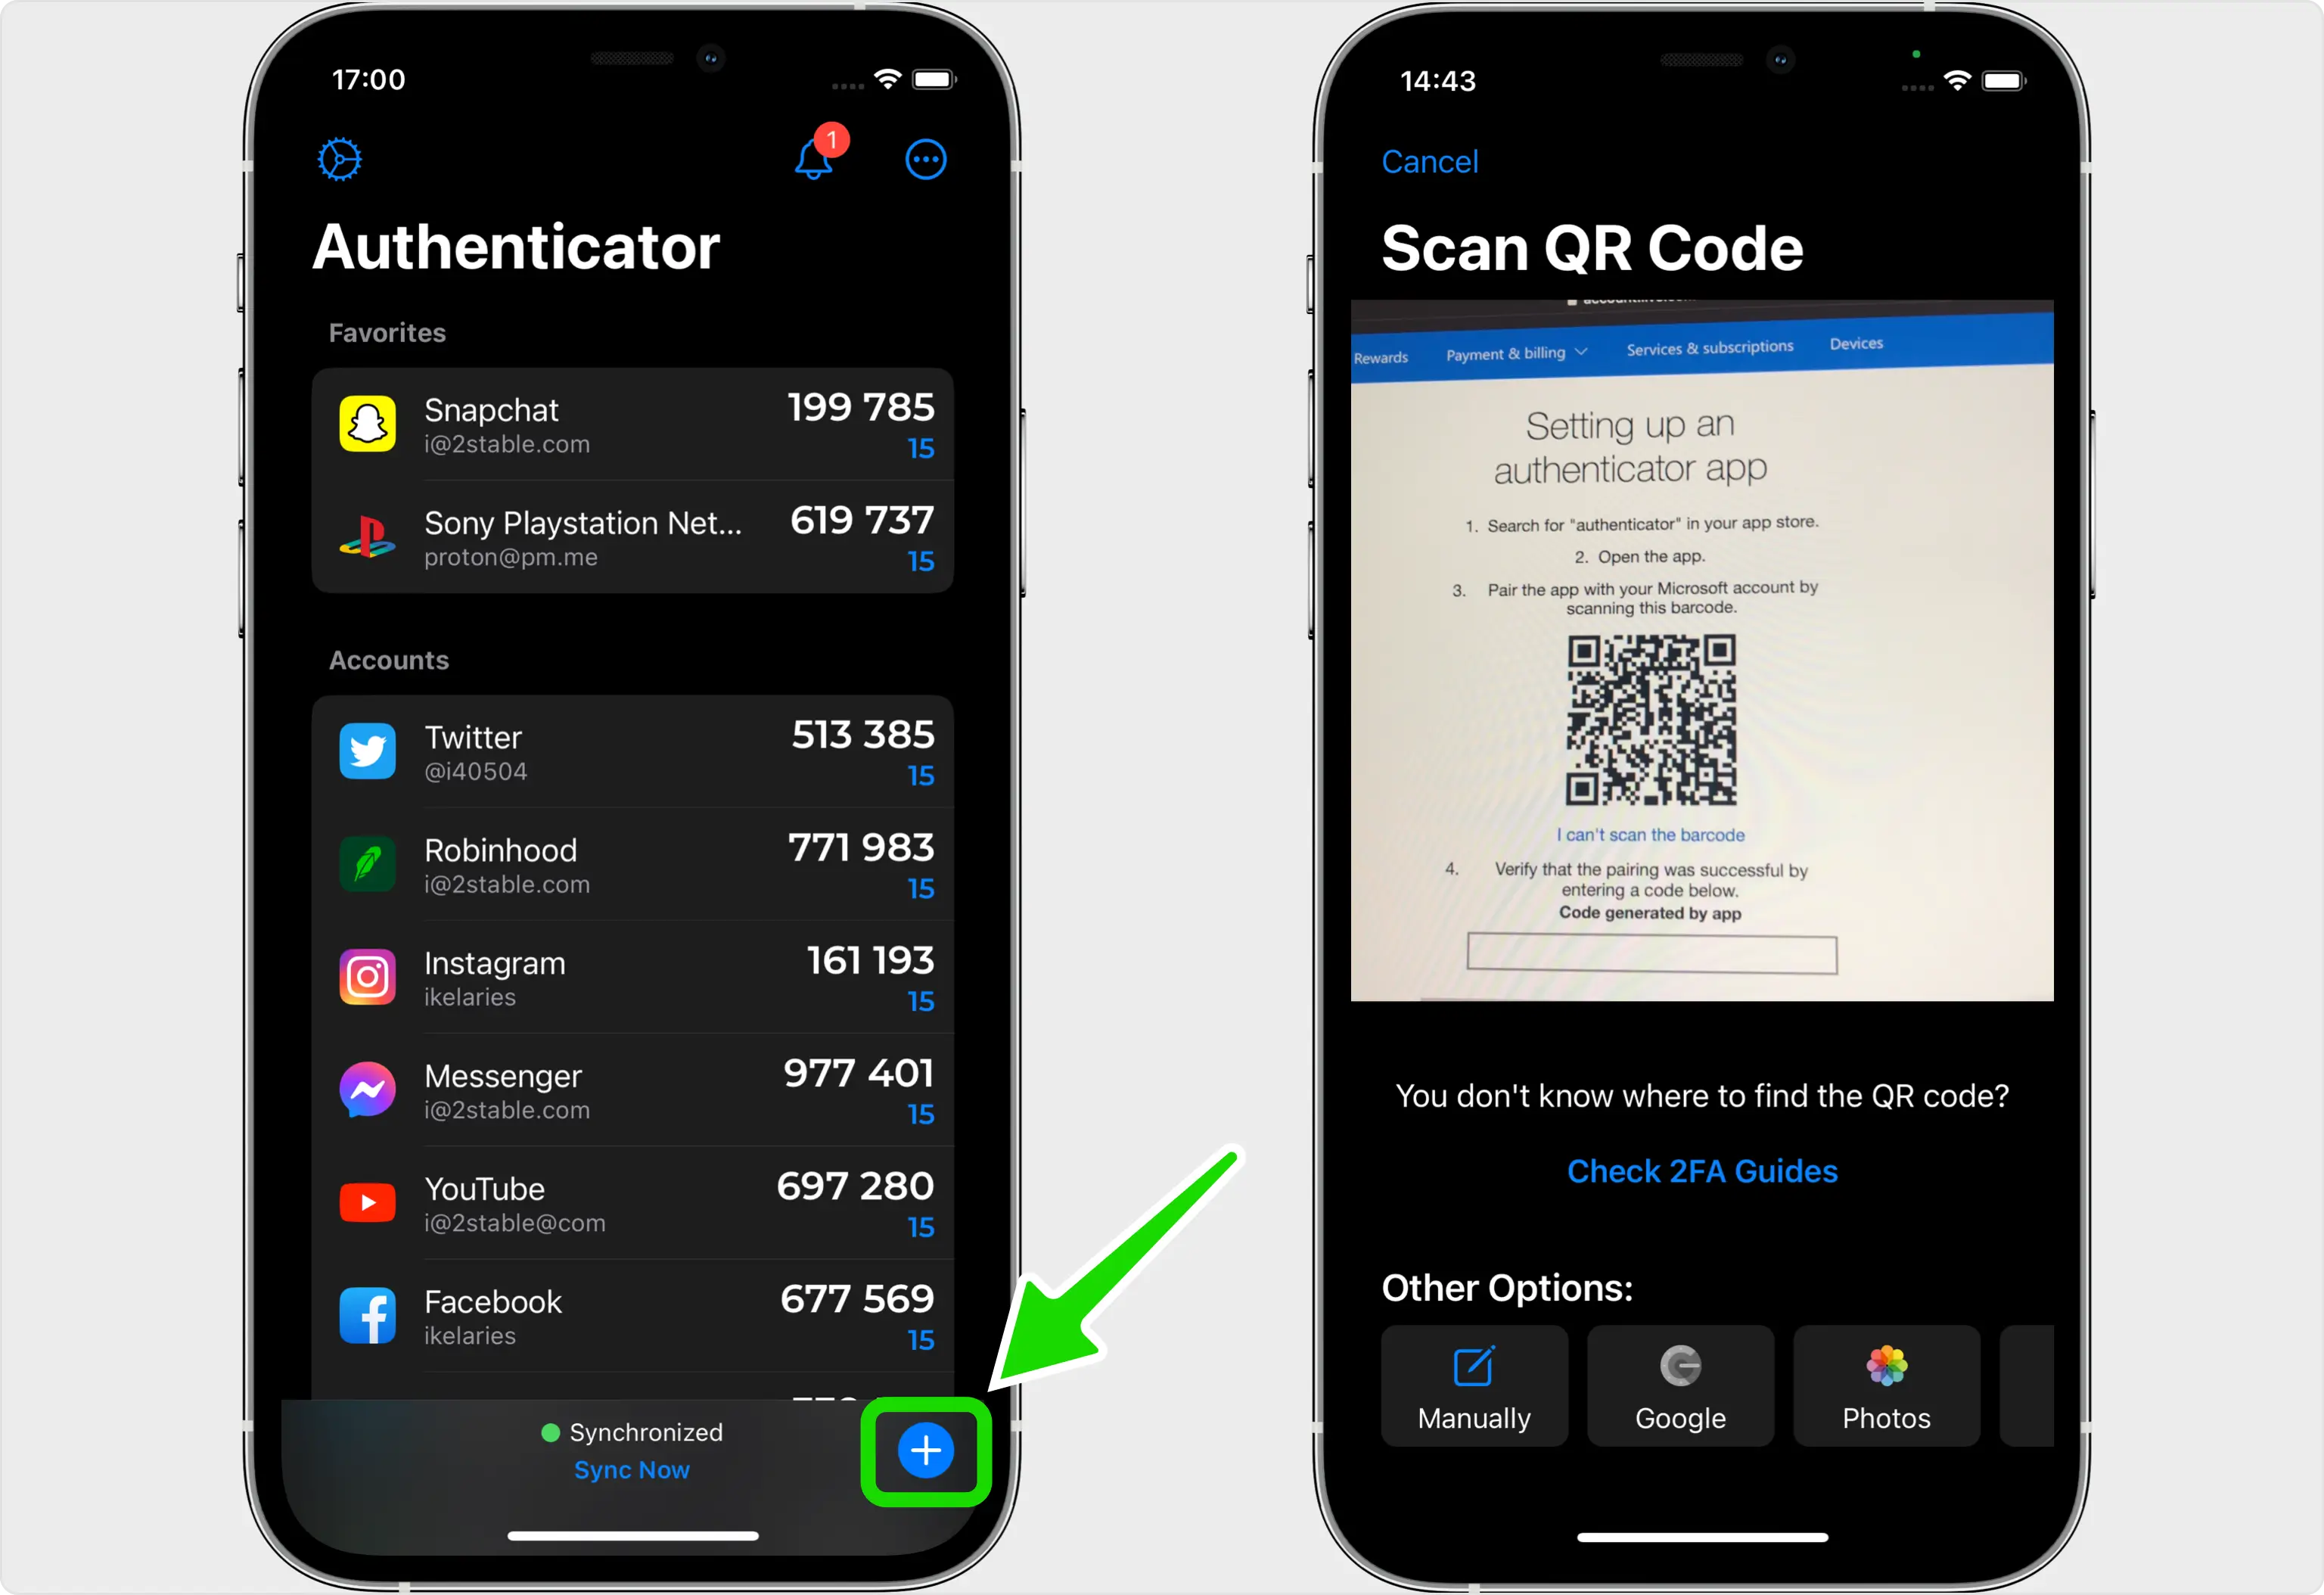
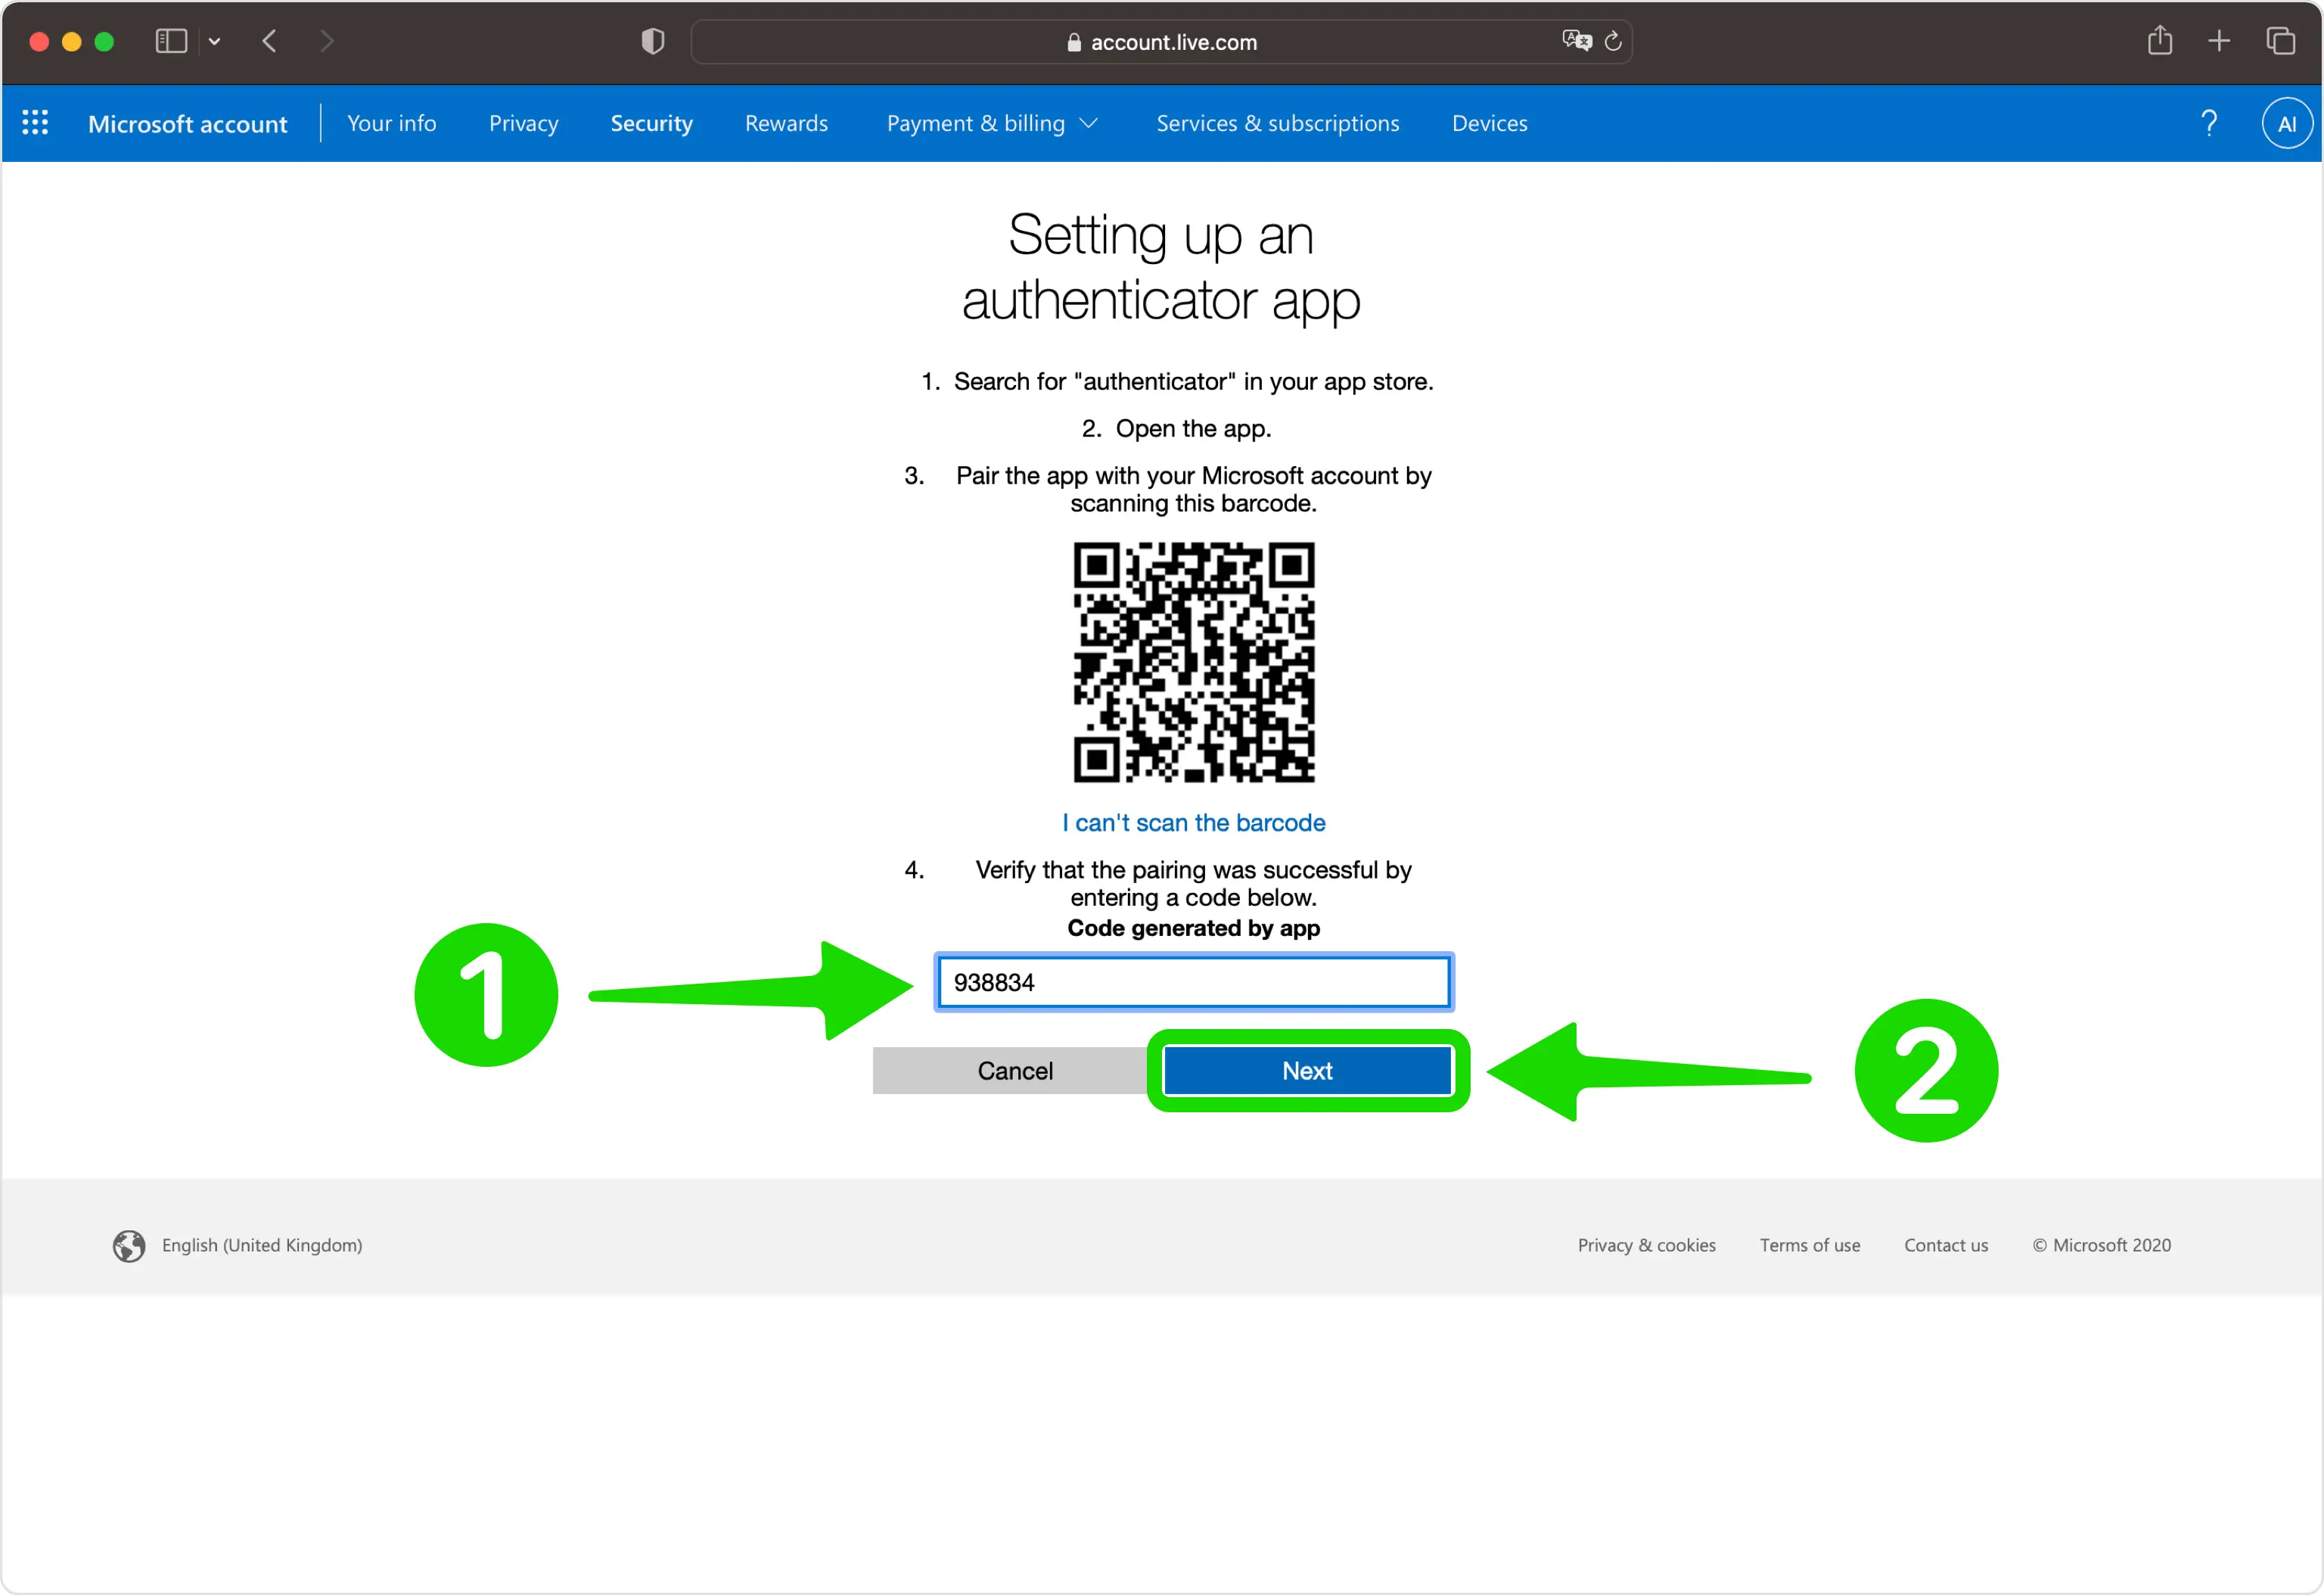
Your Microsoft account will display a QR Code. Open the Authenticator App and tap the plus (+) icon to scan the QR Code. Hold your device up to the screen to complete the scan.
Note: Do not scan the demo image shown below. Ensure you scan the QR code displayed on your Microsoft account page.
9
STEP 9
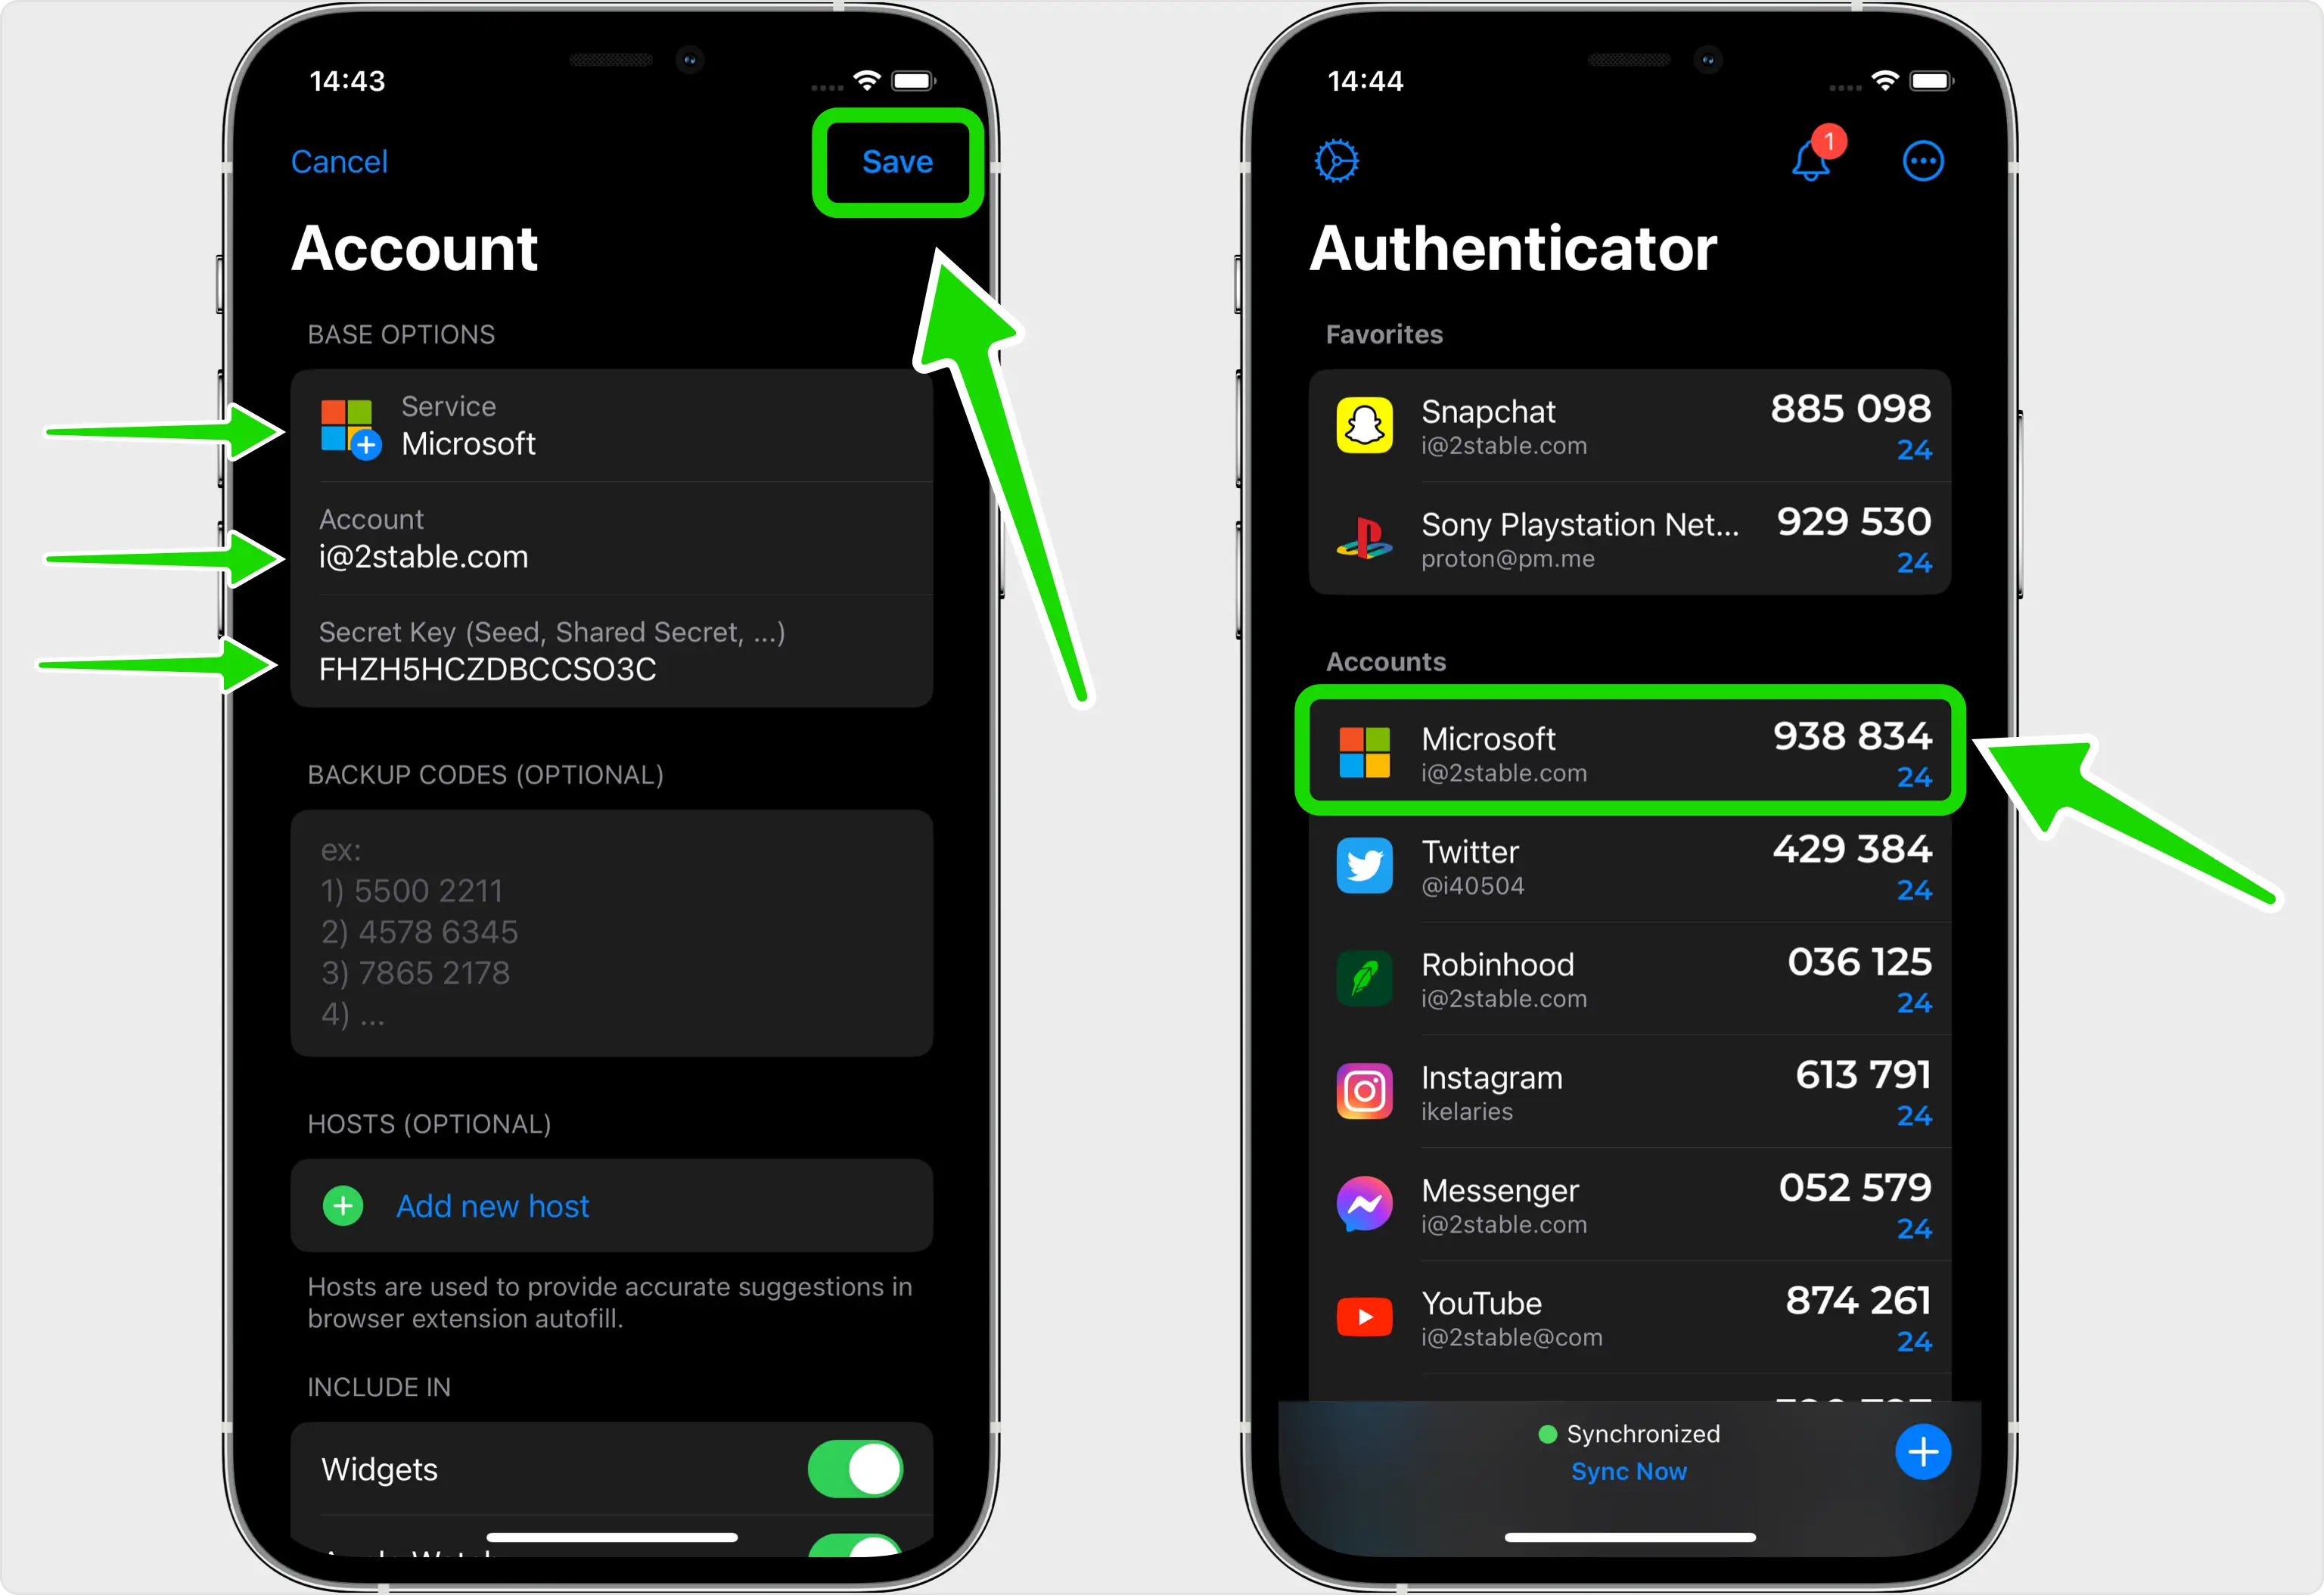
Once the QR Code is scanned, the Authenticator App will autofill the Microsoft logo, account name, and secret key. Tap Save to confirm the settings.
10
STEP 10
Click the Next button to move to the final step and confirm the activation of Two-Step Verification.
11
STEP 11