
Guides


How to Enable Two-Factor Authentication for Playstation
To enhance the security of your Playstation account, enabling Two-Factor Authentication (2FA) is a must. This guide will walk you through the process of setting up 2FA using the Authenticator App.
Step By Step Guide
1
STEP 01
Download and Install Authenticator App
For iOS: Visit the App Store and search for "Authenticator App" Download and install the app.
For Android: Head to the Google Play Store, search for "Authenticator App" and install it.
Download App
2
STEP 02
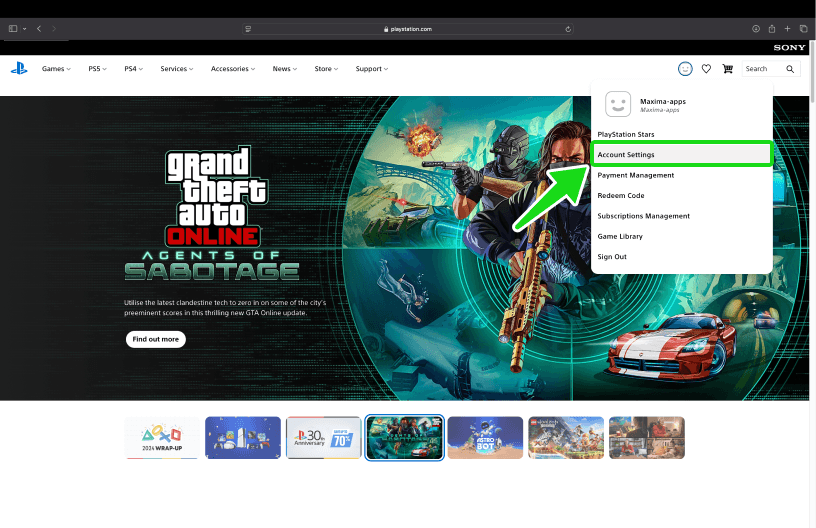
Log in to your PlayStation account
Log into your Sony (PlayStation) account and click on the Profile Icon → Account Settings from the drop-down menu.
3
STEP 03
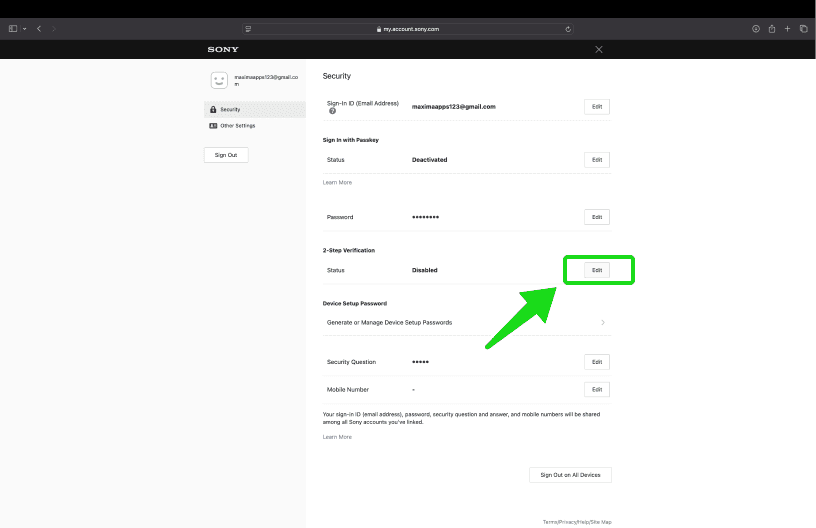
Locate 2FA Settings
Find and press "Security." After a pop-up window appears, choose to "Continue" to proceed to the next step.
4
STEP 04
Enable 2FA
Find the 2-Step Verification section, click the "Edit" button,
5
STEP 05
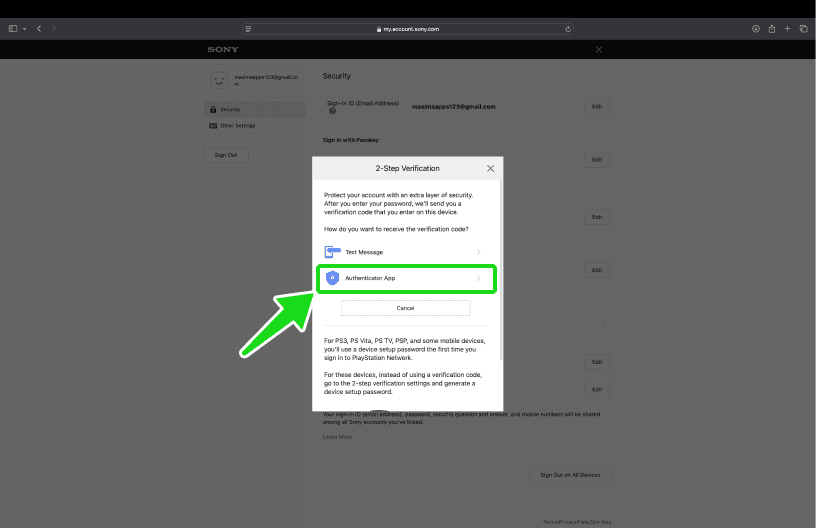
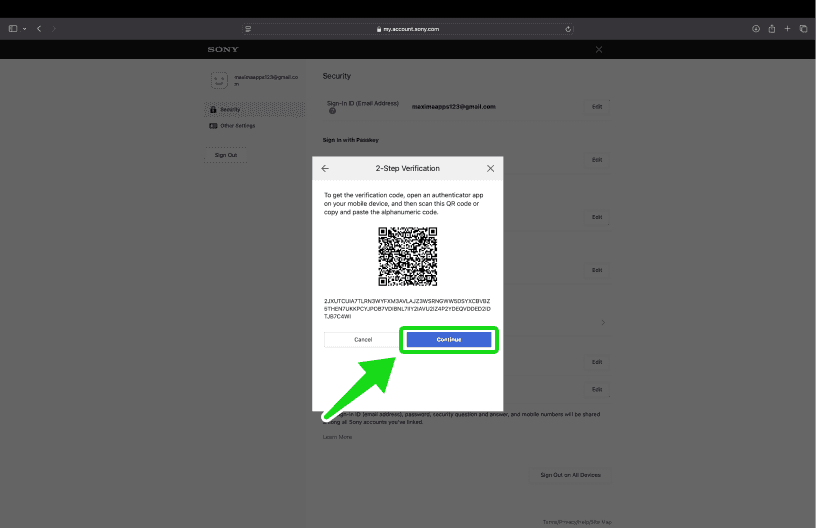
QR Code
A pop-up window will appear for you to scan the QR code with the Authenticator App. Keep this window open as you reach for your phone.
6
STEP 06
Capture QR Code
Open the Authenticator App. At the bottom of the screen, tap the plus (+) sign to scan a new account and hold your device up to the computer screen.
7
STEP 07
Add Your Account
After successfully scanning the QR Code, the Authenticator App will automatically choose the PlayStation logo and autofill the account name and secret key. Confirm it's correct by clicking "Add."
8
STEP 08
You're all set!
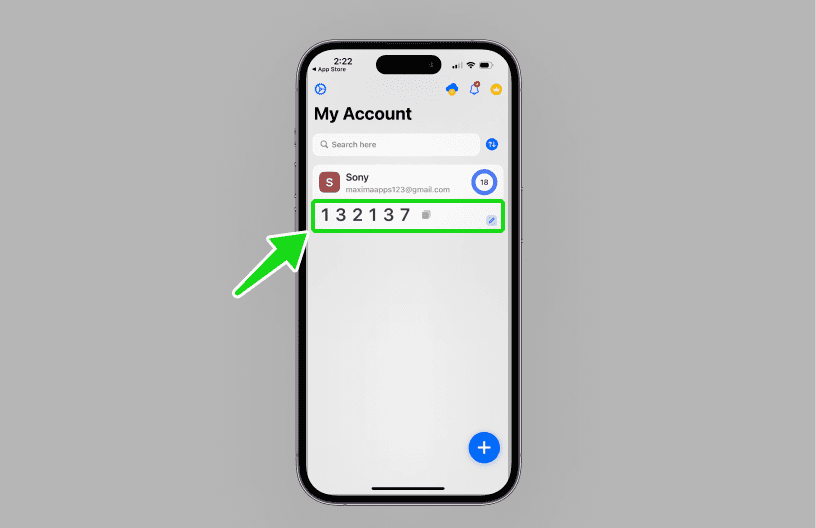
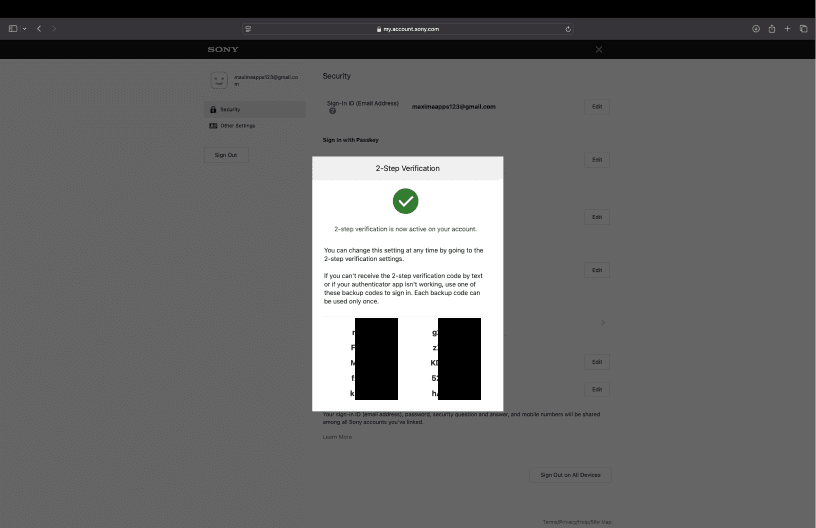
Your PlayStation account is now protected with an extra layer of security. You can save the backup codes in the photo gallery or any safe place. The most important thing is to store the backup codes securely. Click "OK," and that's all.


Still Have Questions?
If you didn’t find what you were looking for, chat with ourhelpful team—we’re happy to answer your questions!
Get in touch